Showing posts with label Remaking. Show all posts

Friday, 27 November 2015

Jumper refashion

I love this refashioned skirt that I made from a jumper last year and find it really practical to wear for work as I can cycle in it and its a decent length. However, as the weather got colder I was struggling to pair it with any of my cardigans or jumpers. I really needed a cropped jumper to pair with it. I started looking at different patterns, the coppelia cardigan and Bonnie sweater were both contenders. The problem was that I also had no appropriate fabric in my stash. I suppose to be stash busting and I've fallen off the wagon a bit lately so I was reluctant to do this. Then I remembered this jumper that I had in my stash. I had 'rescued' it from my boyfriends charity shop pile at one point. Potentially the same rescue mission that I had acquired the jumper for the skirt.
I loved the pattern and the colour was a perfect match for the trim on the skirt. However it was too big and too long for what I wanted so it was time to get altering. I started by putting it inside out on Rosie. I cut off the bottom ribbing and pinned the sides to get the shape I wanted. Then I (carefully) put it on and pinned the arms to slim them down as well. Then I ran all the pinned seams through my overlocker. Sorry I should have taken some photos of this process but I was on a roll. 

The next step was to try the jumper on with the skirt and adjust the length and then reattach the ribbing.  And ta-da one new cropped jumper.
I mentioned in my last post that I wanted to get my boyfriend crouching down to take some photos of me from a better angle and while I did mange it for this photo, it was so cold outside that we took a very limited number of snaps and headed back into the warm.

Most of the photos had me looking like this:
Shivering and with my eyes shut!

Sadly the eyes shut look is one I sport a lot, honestly we sometimes have to take about 50 photos just to get a couple of decent ones with my eyes open!  Just as well I never had aspirations to be a model!

What about you? Do you end up with lots of ridiculous reject photos?  Have a lovely weekend all.

Thursday, 29 October 2015

Teacup pincushion tutorial

I'm really sorry to anyone who thinks that this is far too early to be speaking about Christmas but a) I'm a Christmas nut and b) handmade Christmas presents require time to make.  If any of you were thinking about making some Christmas (or any of other kind of) gifts for sewists in your life, I thought I'd post this tutorial.


This is a really quick make and has such cute results. 

You will need: 
Teacup and saucer
Glue gun and sticks or superglue
Scrap of fabric approx 18cmx18cm
Toy stuffing/leftover wadding
Sandpaper

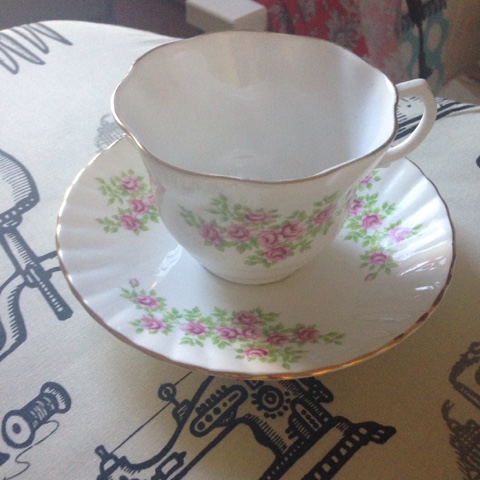
I found this teacup and saucer in a local charity shop and it's going to be perfect for someone special in my life.


First thing to do is thoroughly wash and dry the cup and saucer. Then sand the bottom edge of the cup and the inset circle on the saucer, this will help the glue stick.

Apply glue to the bottom rim of the cup and stick to the saucer. 

Now create a ball of stuffing big enough to sit in the cup and not fall to the bottom

Take the scrap of fabric, (some of you may recognise this as a leftover scrap from my birthday Belladone) iron it if it looks as creased as this one, and place stuffing in the middle and fold the edges round the ball.

Roughly stitch edges together on under side of ball. You don't need to be super neat about this, this bit of the ball will be invisible and glued inside the cup. It's just to hold it altogether while you do the assembly.

Put glue in a ring all round the inside of the cup, about 1cm down from the top edge. 
Put the ball into the cup and push it onto the glue. 

And you're done! All you need to do is add pins! I love that there is also space for other bits and pieces in the saucer. 

This is ear marked for someone special in my life. Right, I'm off to play Christmas elf, I've got lots more presents to make, only 8 weeks to go folks!  And on that note, have a happy Halloween.