Showing posts with label vintage pattern pledge. Show all posts

Tuesday, 27 March 2018

Getting my sewjo back


Hi anyone who is still reading these pages, its been a long time since I had anything to say here.  I’ve had a fairly insane 6 months or so, I finished my doctorate, went travelling (to Japan, I may blog about this later because I bought a lot of fabric), started a new job and moved house!!! It was all pretty intense and all my sewing stuff was in boxes for all of these months.  When I was away, this bothered me a lot less but when I got back I realised how much sewing had been part of my everyday life and there was a big hole there! It's felt so great these last few weeks to be able to do some actual sewing rather than just imagining I'm sewing which is all I've been doing for the last few months.  I found that really stressful as I was creating all these projects in my head and couldn't achieve any of them!
 

However, some stuff has come out of boxes and I have been able to put together some bits and pieces over the last month and I thought I’d relaunch my blogging with my latest Sewcrafty design team project.  When the lovely Sewcrafty ladies reached out at the beginning of the year to see if I still wanted to be part of the team this year, I obviously said yes, despite the fact that at this point my sewing machine was still in a box!  Clearly the practical part of my brain shuts down around any sewing related decisions-obviously this is what happens any time I see a new pattern or go fabric shopping as well!

Anyway as Sewcrafty had this gorgeous poly-viscose mustard crepe in stock I decided this was what I was going to use for my first project.  This is a bit of a departure from my usual fabric choice, I usually pick natural fibres and lean towards ALL THE PATTERNS.  However, I really liked the colour and I think my wardrobe would benefit from a few items in a solid colour.  I did not regret my fabric choice, this fabric was such a dream to work with, quite stable but lovely and spongy so stitches, even my awful hand stitches, just sunk in.
I used Butterick 5478 top pattern, from the 1970s, as my base because I had made it before and thought it would work well lengthened into a dress.  I also keep seeing dresses with big belt details around and have been wanting to make one for a while.  A lot of dresses in Japan were like this, I guess inspired by the Obis worn with Kimonos which were really beautiful.  I made mine by doubling the width and length of the pattern belt and I interfaced the whole thing as I wanted it to have quite a bit of body and dramatic folds. 

The construction of the dress was all fine except for the collar/neckline which I somehow managed to completely fluff, twice!  I think I may be a bit jinxed with this pattern as last time I made it (in a cotton and silk blend) I managed to melt it by getting bleach on it, literally seconds after I had finished making it! Anyway after I had failed to make a functional collar twice and had a series of major swearing sessions, I decided to make a change and make some bias binding to finish the neckline and create some tie closures.
In the end, I'm really pleased with this dress and I love the fact that I feel like I'm returning to sewing and blogging with such a 'me' dress.  Even if there are no patterns in sight, the 1970s style means I'm at least sticking true to form!  Also having worn this dress a few times, I don't find it's as sweaty as other poly fabrics so maybe there's just the right amount of viscose in there to allow it to breathe.  Perhaps I shouldn't be quite so prejudiced against all poly fabrics!  Actually Sew Crafty also have this fabric in a wine red as well and I'm quite tempted to get some of that too!
A big thanks to my lovely friend Dominika for taking the photos!  I'd forgotten how annoying I find getting blog photos and she was so good at ensuring she had taken some decent shots, in good lighting and that I didn't have my eyes shut in all of them!
 
Thanks for reading.

*The fabric was supplied to me free of charge by Sew Crafty, all opinions are my own.


Sunday, 28 May 2017

A vintage outfit!

A couple of months ago the lovely ladies at SewCrafty asked if I'd do a hack of their shift dress pattern and sent me some gorgeous materials to do it with. However my version did not work at all so I threw it in the corner and sulked for a while.

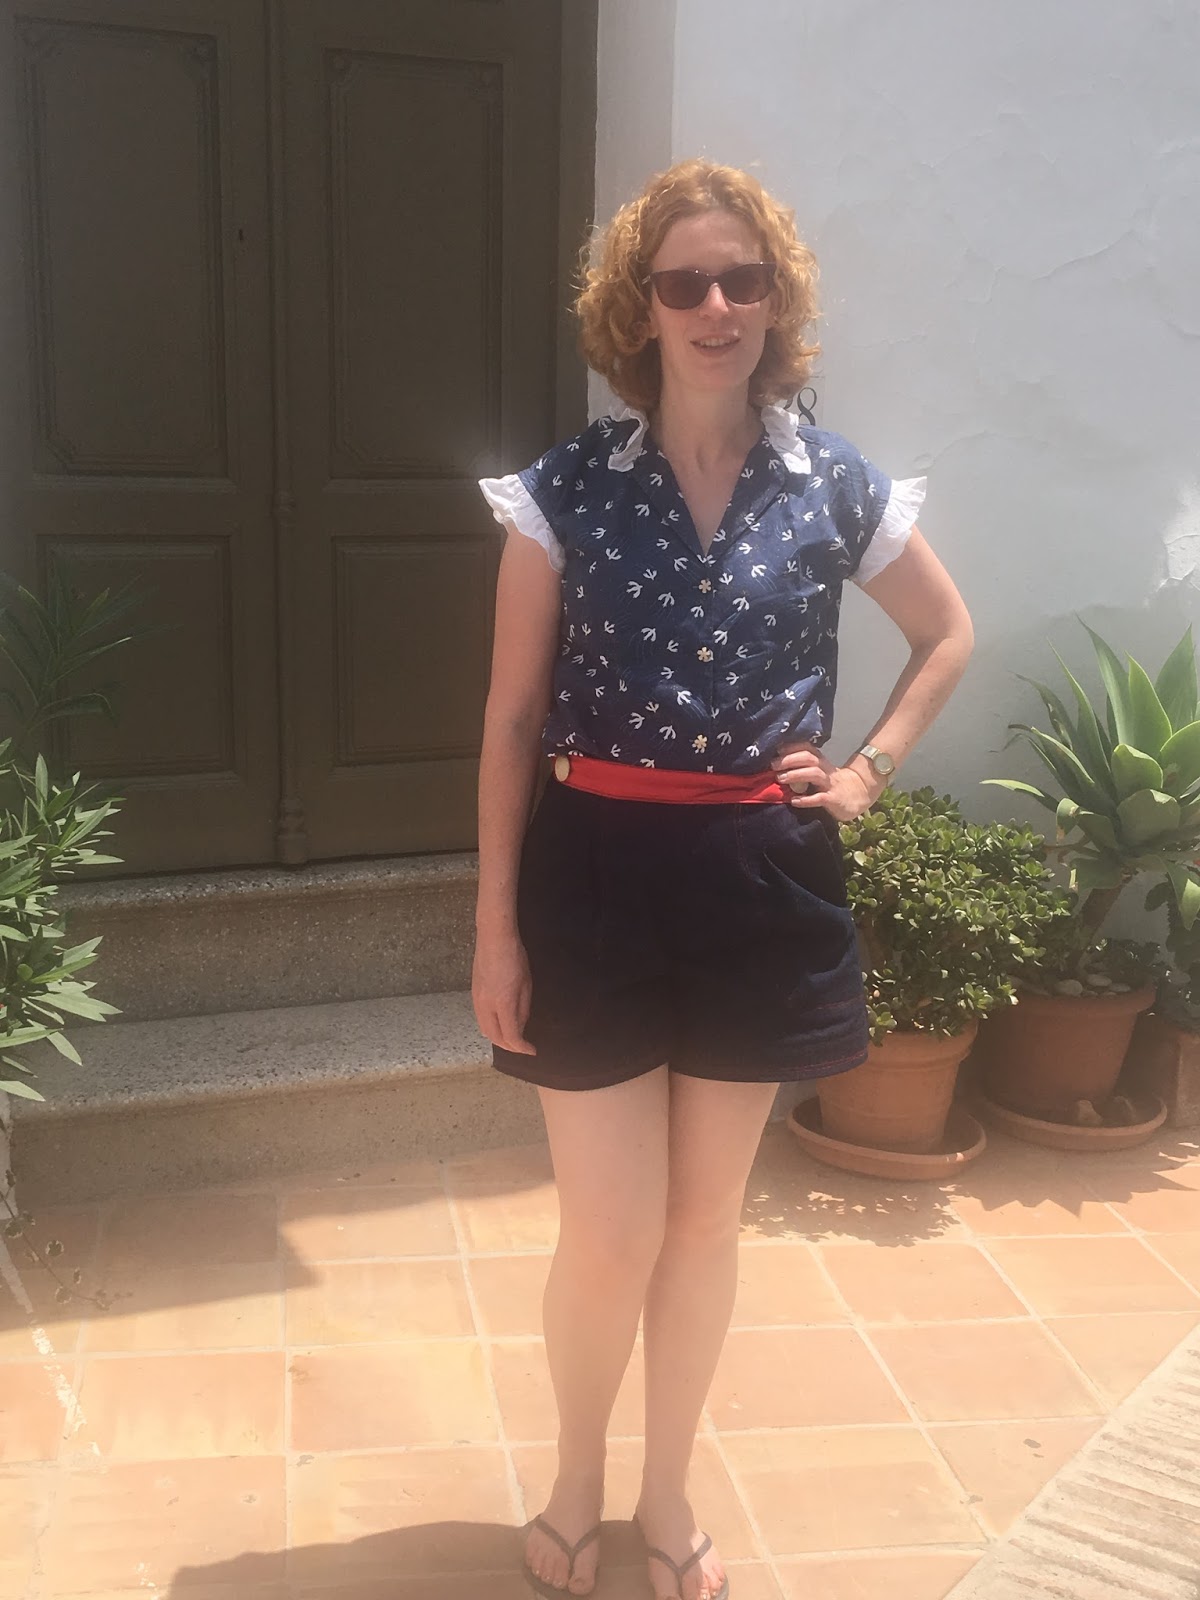
And then I came to my senses and realised that I wanted to do something with the altitude bird cotton that SewCrafty had sent me so I decided to refashion it into something that I would actually wear. Enter this vintage summer blouse pattern from 1982 (apparently this is the year that I sew the 1980s!).  I hummed and ha-d over what size to make and luckily I had decided on the size 12 because when I got it out of the packet this size had already been cut out. I'm not sure where I bought this pattern from, I'm going to guess it was part of a job lot on eBay but I guess I'm lucky that my size remained in tact.

I'm not really a fan of ruffles but they've been popping up everywhere this summer and I thought the ruffled version of this looked cute without being too OTT so I gave it a go. Although I used some little flower buttons from my stash so I wasn't exactly trying to move too far away from the 'cute' factor!  The ruffles were made from some scraps of a cotton linen blend that I had in my stash.


I want so many versions of this top! I've been searching for a good shirt/top pattern for ages and this might be the one! Although I wish it had a sleeved version as in it's current form, it's only good for summer. However hopefully we've got months of summer left so I can enjoy this for a while.


The shirt was worn on holiday with a new pair of Megan Neilsen Flint shorts.  I seem to have become a little bit obsessed by this pattern.  Personally I think this is a super cute look and is also giving off more 1930s vibes. I made the shorts from a scrap of denim that I had in my stash, that I think my mum donated at one point, and some scraps of stretch cotton.  I also used 2 vintage buttons also from my stash. Basically, these were a great stashbuster!


I used red topstitching on the denim and navy topstitching on the waistband and for the button holes. I have done a lot of topstitching recently and I think it adds a really nice detail but maybe it's time to give it a rest now!  I'm actually wearing these shorts as I type, since the weather in the UK has decided that it's properly summer.  I hope you all have a lovely weekend in the sunshine!

Sunday, 11 December 2016

An unusual vintage make

I'm squeezing in another vintage make before the end of the year.  I've been really enjoying making clothes from vintage patterns this year and this is now my eighth vintage make of 2016.  I've far outstripped my pledge.

I bought the pattern in a charity shop earlier in the year and the price of 75p is still attached.  However, I've forgotten where I picked it up.  It's an unusual pattern, the Wikia entry tells me its from the early 1960s. This means that in addition to sewing up 8 of my vintage patterns, I have also covered three decades with these patterns.  This was my only pattern from the 60s, one was from the 80s and the rest were from my beloved 70s.

The pattern is meant for knit fabrics and is the oldest knit fabric pattern that I've ever seen.  However.I found some of the construction details a little odd, as it uses darts and facings and suggests a zipper closure in the back.  This maybe because I've previously only used more modern knit patterns.  I was wondering if it was because knit fabrics were relatively new back in the early 60s so the patterns were still adapting to the qualities of the fabric?  Let me know if you know better.

I used this cotton jersey from girl charlee and made up view B, with the fabulous cowl collar.  And I've only just realised that I've made up a very similar dress to the pattern art version, although I've got squares rather than flowers.  I mainly followed the instructions, although I omitted the zipper as the dress was roomy enough and had enough stretch to pull over my head.  There are no instructions about using zigzag stitches or adapting to the knit fabric in any way.  I don't know if this is because they assumed we knew to do this or because people didn't adapt to knits in the same way in the 1960s.  Anyway I treated it a bit like a woven, since I figured it wasn't going to be stretching much and so just used straight stitches.  I've worn this a lot since I made it and so far no stitches have popped out so hopefully this was an ok decision.


The dress is a little big on top, although it fits great on the bottom.  I guess that's the curse of one size patterns (and lazy people who avoid making adjustments where possible) but it's not too much of an issue and I quite like the slightly blousey effect when it's worn with a belt, which I always plan on doing as the total lack of waist is not a look I go for.
I love the collar on this dress. My favourite 70s patterns all have big collar details, maybe that's what drew me to this 1960s pattern.  I think this may be my favourite vintage pattern make of the year!


Friday, 16 September 2016

Super funky coat sewing


Any of you who follow me on Instagram may have seen this photo that I posted as part #vpjuly as my next vintage project.  
This year I have been using my vintage patterns way more than before, I managed to complete my target for my Vintage pattern pledge back in July, so this is a bonus Vintage item and I'm happy to say its a good one!  When I took the photo, it was still very much just an idea. But then Melissa put out a call for bloggers for her Sew Long Summer blog tour and gave me the motivation I needed to take on a more challenging make than I've attempted before.


At the risk of sounding like a broken record, I love Style 1970s patterns. This one was an eBay find a couple of months back.  As well as sewing from more vintage patterns, I have also bought quite a few this year.  I now need to sew even more vintage styles to justify all that spending!


I found the fabrics on Walthamstow market on a visit organised by Kerry and I thought they'd make a perfect coat. Marie bought some of the outer fabric too and I'm excited to see what she makes with it. Luckily these fabrics were really not expensive so the fact that I don't really do muslining would be less problematic, if it all went wrong.  The fabrics are some kind of synthetic and I think the geometric one is an ex Zara fabric, it has lots of metallic threads in it and frayed like crazy, I keep finding metallic thread bits in odd corners of my house now!  As the poly content of the main fabrics was not going to keep me warm, I bought a thin wool/cashmere remnant on Goldhawk rd to use as interlining. I know it's an Autumn/Spring coat but it's also the UK and we have very odd seasons, also I am always freezing so need all the help I can get.


Like most patterns of this age it's a single size pattern which has pros and cons.  It means I don't need to trace off the pattern pieces which I hate to do and have no compunction about cutting out the pattern pieces.  On the other hand I can't grade between sizes which means a bit more work when adjusting the pattern pieces.  I didn't have to make too many adjustments, I added extra at the hips and when sewing up I used a 1cm seam allowance on the sleeves and around the arm holes as I always need a bit more room for ease of movement.  At some point I will learn to make the adjustments need to properly allow myself better arm movement as this is a problem I regularly have.

I was taking a jacket making course along side making this coat which was very helpful as the instructions made my head hurt.  Vintage patterns have many fewer instructions and they are often not very well explained, I guess at the time everyone would have learnt at school or been taught by a family member and so would have known how to do many of the things which are not explained in any detail in the instructions.  For example at one point they instruct you to 'make bound button holes'!  Now aside from the fact that I would have needed much more hand holding than this to be able to create a bound button hole, there was not a chance in hell of me actually making them for this coat.  This was another area where the jacket making course was invaluable, they told us about this place in Soho that will create professional buttonholes for you in 5 minutes on industrial machines!  I took my coat along to DM buttons and had them do my buttonholes.  They informed me that I'd marked my buttonholes on the men's side, oops!


The poly content of the fabrics made them a total nightmare to work with in some ways.  They do not press at all well, to the point where I think I'm going to have to stitch down my lapels!  The outer fabric has no give in it at all, actually a wool would have been more forgiving, hopefully the next version will be a bit easier to manipulate when sewing.  The lining fabric had quite a lot of stretch to it which made sewing them together particularly painful, especially at all the handstitched hems.  The addition of the interlining also caused some problems and there is some buckling in places on the coat that I think has to do with the multiple layers pulling in slightly different areas.  The buttons were vintage wooden ones that I had in my stash, I have no idea where they came from originally but I think they work well for this coat.


This is a fun coat which I'm excited to wear once the weather breaks.  However, for the time being it's going to sit in the cupboard as London weather appears to have mistaken September for the new summer and getting these photos was actually painful!  Not that I'm complaining about the extra sunshine!

As part of the blog tour, some lovely pattern companies have offered us all some discount codes:
Zierstoff Patterns-20% off   Code-zierstoffpatterns20  Ends-17/09/16
Blue Dot Patterns-25% off patterns.  Code-SewLongSummer  Ends-17/09/16
On the Cutting Floor-50% off patterns.  Code-SEWLONG  Ends 17/09/16
Also taking part in todays tours are:
Sewing by Ti
Musings of a seamstress
Tales of a tester
At Margareta's house
Sewing a la carte
Birds of a kettle
Check out the fabulous things that they have made.  The full line up for the week can be found on Melissa's blog.  I'm off to enjoy the final summer sunshine, what ever the blog tour is called, I'm so not ready to say sew long yet!

Saturday, 30 July 2016

Seriously, how are the 80s vintage?

Have you all been enjoying #vpjuly on Instagram? I've loved seeing everyone's makes and vintage inspiration.  Today I have another make towards my vintage pattern pledge, however, it's a bit different from my usual style. As a child of the 80s, looking at childhood photos means exposure to a lot of bad clothes and even worse hair styles.  So 1980s patterns have never appealed to me much.  Nor is the idea of thinking of myself as Vintage!  Although I may just have to get over this.  
A month or two back, I was on a weekend away in Bristol and spotted this pattern in a charity shop.  Despite being from the 80s, it actually appealed to me, reminding me slightly of the True Bias Southport dress which I have been considering trying for a while as I wanted an easy to pull on casual summer dress.  As the loose fitting, elasticated waist dress is not usually a style that I go for, I appreciated giving it a go with a pattern that only cost me 50p.

I went rooting around in my stash for a suitable fabric and found bits of a lovely chambray which I think may have come from my Grandma's stash and some scraps of a red and white striped shirt.  I thought these would work as a perfect, semi nautical combo.  I made some adjustments to the pattern for a number of reasons.  The skirt is slightly narrower than the pattern pieces as I didn't have enough fabric to cut the full width, I still think it's plenty full enough.  The pattern calls for piping round the neck and arm but I just used binding as I thought piping at the neck and arms would be a bit weird. I did make piping for the pockets though, gotta love a bit of piping.  The tiny amounts of the red and white fabric that I was working with meant that many of the bindings and the belt are pieced together.


I kinda ignored the instructions and made it up as I went along so I can't really comment on what they are like.  They did call for a 1/4" elastic at the waist but I used 1" elastic as I wanted the waist to be more emphasised.  Since this isn't a fitted style, I only had to make one fit adjustment, which was to take it in under the arms by a good 6cm.

Hmm I must stand up straighter!

While it was lovely to work with and feels lovely to wear, this fabric creases like crazy.  I ironed this about a million times but its still so creased.  I guess that's part of the style.  I've never worked with chambray before so I have no idea if this is normal or not.

Overall this is a cute, wearable casual summer dress but don't love it, I guess I still need some work to be converted to the 80s, although thinking about it, one of my favourite makes from last year was this 80s top so maybe there is hope for me after all.  Oh well, I've already planned my next vintage make and it's another 70s one so hopefully my favourite vintage pattern decade won't let me down. 

Sunday, 29 May 2016

Going back in time

Today's post is about a pattern I'm very fond of, partly for the style and partly because this is the pattern I used to make my first ever item of clothing, about 5/6 years ago.  It's Style 1241, a 6 gored maxi skirt.  I originally made it with zero sewing knowledge so as you can imagine there were a lot of flaws.  The pattern, while detailed, does assume quite a bit of pre-existing sewing knowledge and I remember spending significant amounts of time on the phone to my mother asking what various things meant.  However, I loved it and wore it until it actually fell apart.  The original skirt was in colours very similar to these and when I spotted this stretch cotton on Goldhawk road I had to have it.

This pattern eats fabric, I used about 3.5m, although the fabric was fairly narrow.  However, I think it's worth it as I love gored skirts, they're so flattering.  I didn't make any adjustments when sewing it up except that the waist band piece is damaged and clearly at some point has had a chunk removed from the middle so I had to create a new waistband piece.  As I still had part of it, I was given the width of the piece an simply had to measure the skirt pieces and add a few cm for the overlap, not exactly rocket science.  I remember the waistband being an issue on my first version clearly this is why and my understanding of how to fix it was sketchy back in the day.  This time, I got it nailed first time!  It's amazing what a difference practice makes!

I may wear this skirt pretty much every day for the rest of the summer now.  Anyone following my me-made-may photos, prepare to be very bored!  Also at this rate there is a danger of my entire wardrobe becoming 1970s themed.

My lovely sister took these photos for me in my local park, thanks Nini. I love this park and the band stand. I saw a couple getting married there last summer and it was so pretty, like the perfect place (on a sunny day) to get married and to take blog photos.

It has just occurred to me that we are now not even at the end of May and I have almost achieved my vintage pattern pledge.  This makes me happy as I love my vintage patterns and being able to fit vintage makes into my wardrobe.  I'm sure I'll properly outstrip my pledge this year as I currently have plans for several more makes and they're not all from 70s patterns either!  How're you getting on with yours?


Saturday, 7 May 2016

I don't need a time machine, I'm recreating the 70s right here

I really have caught the 70s bug and despite, in my last 70s dress post, criticising original 70s garments for being made of synthetics I've now gone fabric authentic and created my own polyester 70s number.


That being said my polyester fabrics feel lovely. The black one is a yummy ponte from girl charlee and the tartan was donation from a friend of my mums. I've had the vision of a princess seamed dress using this tartan ever since I received it. I was tempted to buy the By hand London Sabrina dress after seeing this gorgeous version by Ooobop but in the end decided to use a pattern from my stash.


The pattern is Style 4588 which I used once before here. I made a few modifications; I added the same amount of length as last time, this pattern is really meant to be a tennis dress and apparently if you were playing tennis in the 1970s it was acceptable to flash your (matching) knickers! I didn't fancy the flutter sleeves which came with the pattern so used the sleeve pieces that came with a different vintage pattern in my stash, with a bit of rough and ready adjustment to for a slightly different sleeve head. I figured the ponte was going to be quite forgiving and it turns out I was right.  I didn't think the flutter sleeves would work with the slightly rock chick fabric combo. Although I'm not convinced that the puff sleeves work with that vibe either but this would probably bother me more if more rock chick credentials had ever been greater than zero!
 The first time I went out to get photos of this dress, it was so windy that the skirt blew around constantly and this was the best photo that we could get.  Instead we went to look at books on a barge with a band on top.  Add a coffee and that's a winning day out in my book.

What's your favourite style decade?  While I love styles from many different decades, the 70s are clearly winning in my wardrobe at the moment.

Thursday, 14 April 2016

Maxing out the 70s vibes

Hi All.  I'm on a bit of a 70s roll at the moment, it's one of my preferred decades for style, although I'm not a fan of the browns and oranges and synthetic fabrics that original 70s clothes were often made from.  So while I tend not to buy 70s clothes when I find them in charity/vintage shops, I have a lot 70s patterns and I'm currently working my way through them.
I've had this pattern on my to-make list for a while. The collar and the unusual V shaped side panels appealed to me. When I was thinking about doing some holiday sewing, I realised that I had the perfect fabric for it in my stash; a slightly psychedelic, rose print viscose that my mother had bought for me in Paris a few years ago.  I hadn't managed to find a use for it yet as the print is very bold and the fabric was super slinky I thought would be difficult to use.
Great combo, no?

As ever, I didn't make a muslin and I was scared of the dress being too small, so I added 1.5cm all over to pattern pieces.  While this was necessary at the hips, and in fact I could do with a touch more ease across the hips when I'm sitting down, the finished dress is a bit too big in the bodice.  It's still very wearable and the extra room made it nice and cool in the holiday sunshine but it's something for me to note for my next version.
In this photo you can just about see my 'tan' on my arms, of which I am inordinately happy with, but I still look stupidly pale beside your average person.  Damn you, pale Irish skin!


With the exception of the collar, the dress was a straightforward make.  Even the side panels, which I thought would be a nightmare, went in easily.  However, getting that collar in was a nightmare, I must have ripped it out at least three times.  It's still very far from perfect but at least the gap at the bottom looks (semi) deliberate now.  There were no instructions to interface the collar but I did as the fabric was super drapey and would have just flopped over without it.  Like a lot of vintage patterns this one provided no instructions about how to insert a zip, nor which kind of zip to use and in fact in this pattern the part where they tell you to put it in is so brief, you'd blink and miss it!  I used an invisible zipper, which gives a nice clean finish.

While the fabric didn't really pose many problems when I was sewing it together, however, it creases like crazy, as evidenced by this back shot.

You can just about see the side panel detail in this shot.  I think these side panels would look great in a contrasting fabric to make a feature of them and I have some plans brewing for another version of this dress with contrasting panels.

There were arm facings included in the pattern but firstly I'm not a fan of arm facings as I feel like they flick out too easily and secondly I didn't have enough of the fabric to cut them so I decided to make some bias binding from some orange cotton that I had in my stash.  It happened to match the orange roses on fabric perfectly which I found pleasing.  My binding could have done with being stretched a little more round the arm hole, although it sits flatter against my skin than it does against Rosie the mannequin!

This was a really lovely dress for floating around in the sun and the viscose felt lovely and cool against the skin.  I now really want to wear it again and I would love the UK weather to oblige (anyone bored of listening to me whinge about how miserable the weather is yet?)  There has been some distinctly spring like weather this week so you never know, I might get a chance to wear it again soon.

This is another make towards my vintage pattern pledge.  I'm doing pretty well towards my goal already, although, at this rate, there's a distinct chance that all my makes will be from the 70s!  I must see if I can use some of my patterns from other decades, I'm feeling very inspired by all the other makes on the Pinterest board.  How are you getting on with your vintage pattern pledges?    

Wednesday, 30 March 2016

Vintage summer

Hello and happy Easter/Spring/something! It's been a while since I posted as I've been off enjoying some well deserved sunshine after a manic month or so of work. Today I have a very summery dress to show you. 


Last year I bought this 1976 Style pattern and used it to make a halter top as I didn't feel like a dress like this would be useful in the British climate, however when my lovely boyfriend booked us a holiday in Caribbean (!!!) I suddenly had an excuse for a dress like this.

The halter top didn't really get worn as the bodice was too loose and I was worried about potential flashing!  However at least making that version meant that I knew what alterations I needed to make for my holiday dress.  I shaved off a good 6cm around the bust, grading out to the pattern sizing at the waist. I also added some length to the bodice. 


On the same thrifting trip as I found the sheets for my Vintage Shirt Dress, I found this duvet cover for £2.99.  The second I saw it, I thought it would be great for a 'floating around in the sun' type dress.  Match made in heaven for my vintage halter dress, no? I lined it with some white cotton that I had in my stash.


Turns out this is the perfect floating around in the sun dress. However when I was actually in the sun I was having too much fun to get decent pictures so you're going to have to put up with shots of the dress modelled by my mannequin Rosie. 


Not only is this a sunny weather win, it's my first make for my vintage pattern pledge! I love the 70s and have quite a few 70s patterns that I want to make up. However, apparently they were very into the midi skirt in the 70s but I am not! I much prefer my skirts firmly above the knee or floor length, so I chopped a good 10cm off the bottom of this (although some of this excess length was caused by my lengthening the bodice). 


The pattern suggests a hook and eye closure for the halter but I wanted something a bit more secure and decorative and so used this cute button from my stash. Actually to be extra safe I'm going to add an extra hidden button to the halter as it did slip a little while wearing it.

Sunny selfie!

It's become quite hard to believe that this time last week I was floating around in the 30 degree sunshine.  The U.K. Weather is turning it in to a distant memory, which is problematic as my brain is firmly in the summer sewing camp so there may be some weather inappropriate wear in future posts!