Friday 29 September 2017

And it's a wrap!

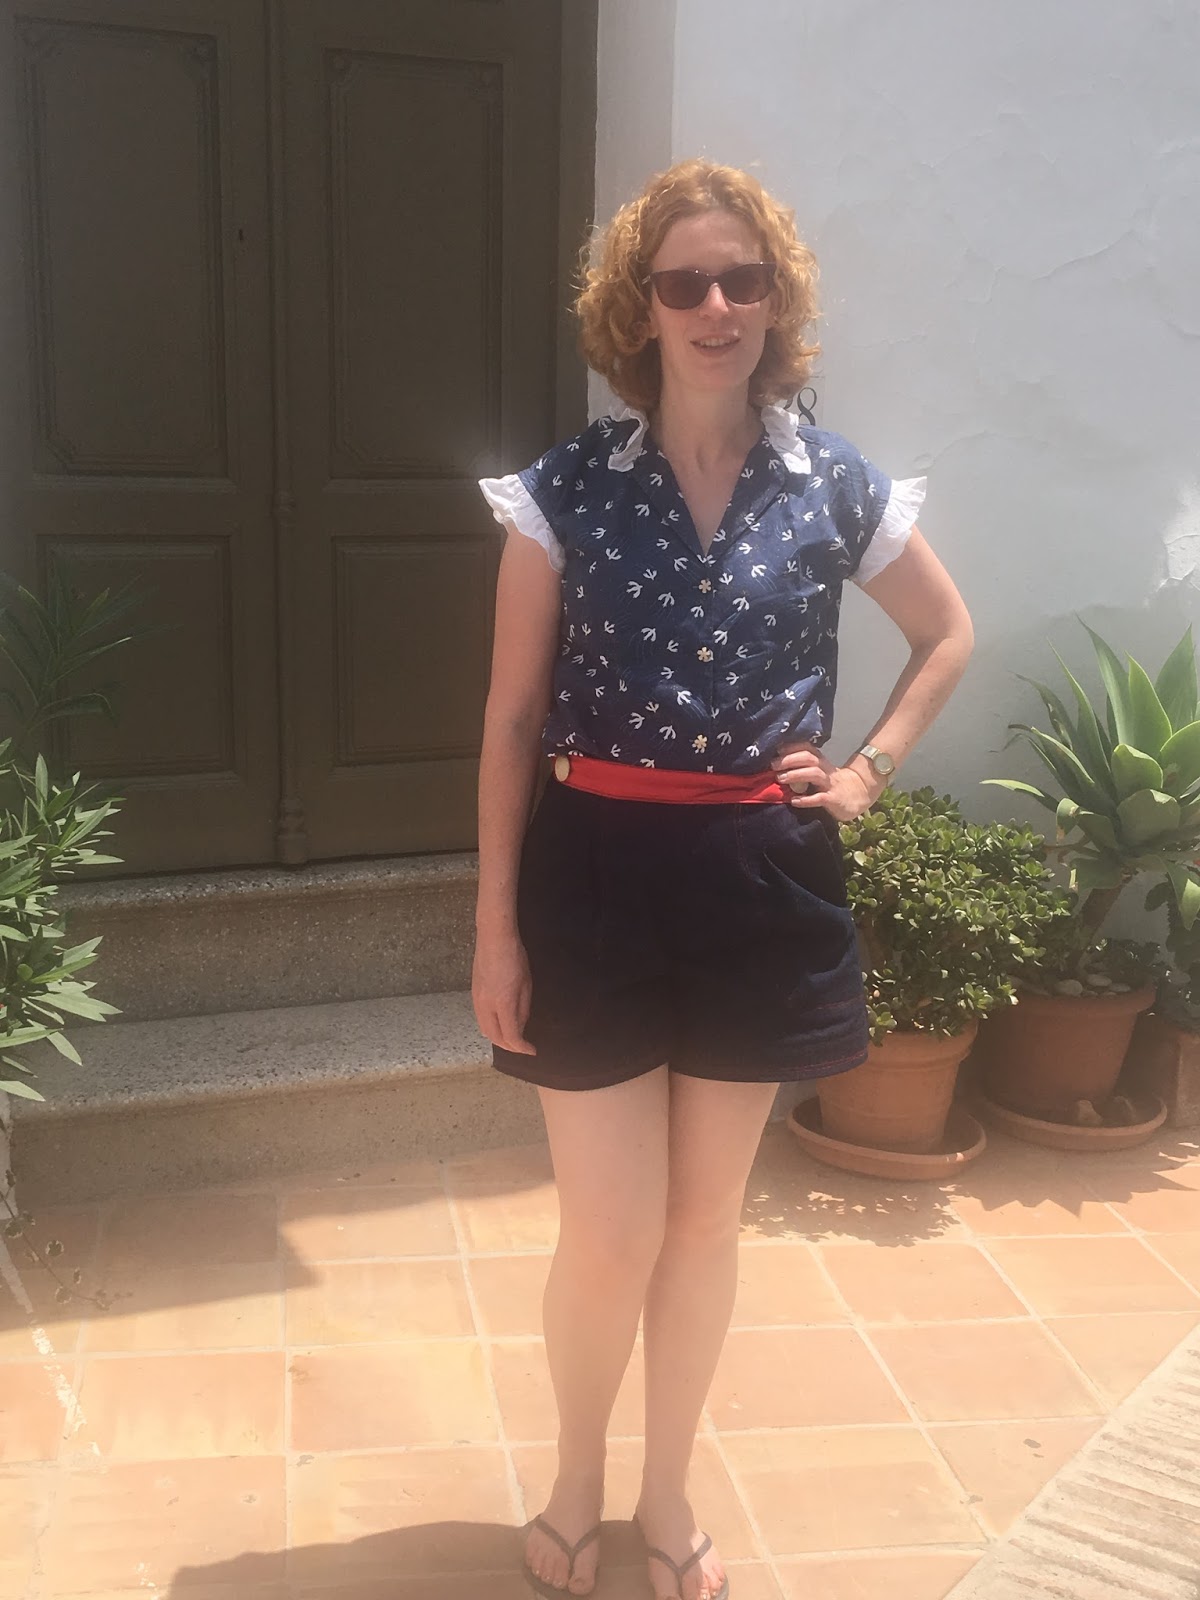
And with that incredibly unoriginal title, today I have a Sew Over It ultimate wrap dress to show you.  I was given this pattern, along with the vintage shirt dress for Christmas 2015 and I really don't know why it took me so long to get round to making it!
This is actually my second version of this dress. I made my first version back in May. Any of you who follow me on Instagram may have spotted it in my me-made-may photos. However I just didn't love this version, the neckline was too wide, leaving my bra straps on show and making it seriously boob-y. I also felt the fabric made me look a bit like Minnie Mouse! In my recent moving house clear out, it got donated to the charity shop. I always kind of hope that I'll spot someone in my local area wearing one of my me-mades that I've donated. Anyone had this experience? 

On my previous version I'd lengthened the bodice but on this one I brought the neckline in by about an inch and a half on each side and then gradually tapered it down to the waist. I also obviously added a lot of length as I've been dreaming of creating a wrap maxi dress all summer. 


I used a light weight cotton jersey from Girl Charlee. Although it's quite thin, it didn't do that irritating curling at the edges thing that some thin jerseys do. I also love this print. Construction was pretty straightforward. I used my overlocker for a lot of it and the rest on my sewing machine. This is one of the first garments I've made since getting my new walking foot for my sewing machine and it's made such a difference. I'm really pleased with how all the stitching has turned out. 


I've got the boob coverage sorted but I think if I was going to make another maxi version, I'd probably widen the skirt pieces at the bottom as I flash my legs all the time.  Flashing my calves to the world is not exactly a problem but I think it would sit a bit better with slightly wider skirt panels. Ideally I would have made it a little longer too, however, I did not have enough fabric to make any of these changes on this version , there were only minuscule pieces left once I had cut it out.  Anyway, while it's far from perfect but I'm really pleased with it. 

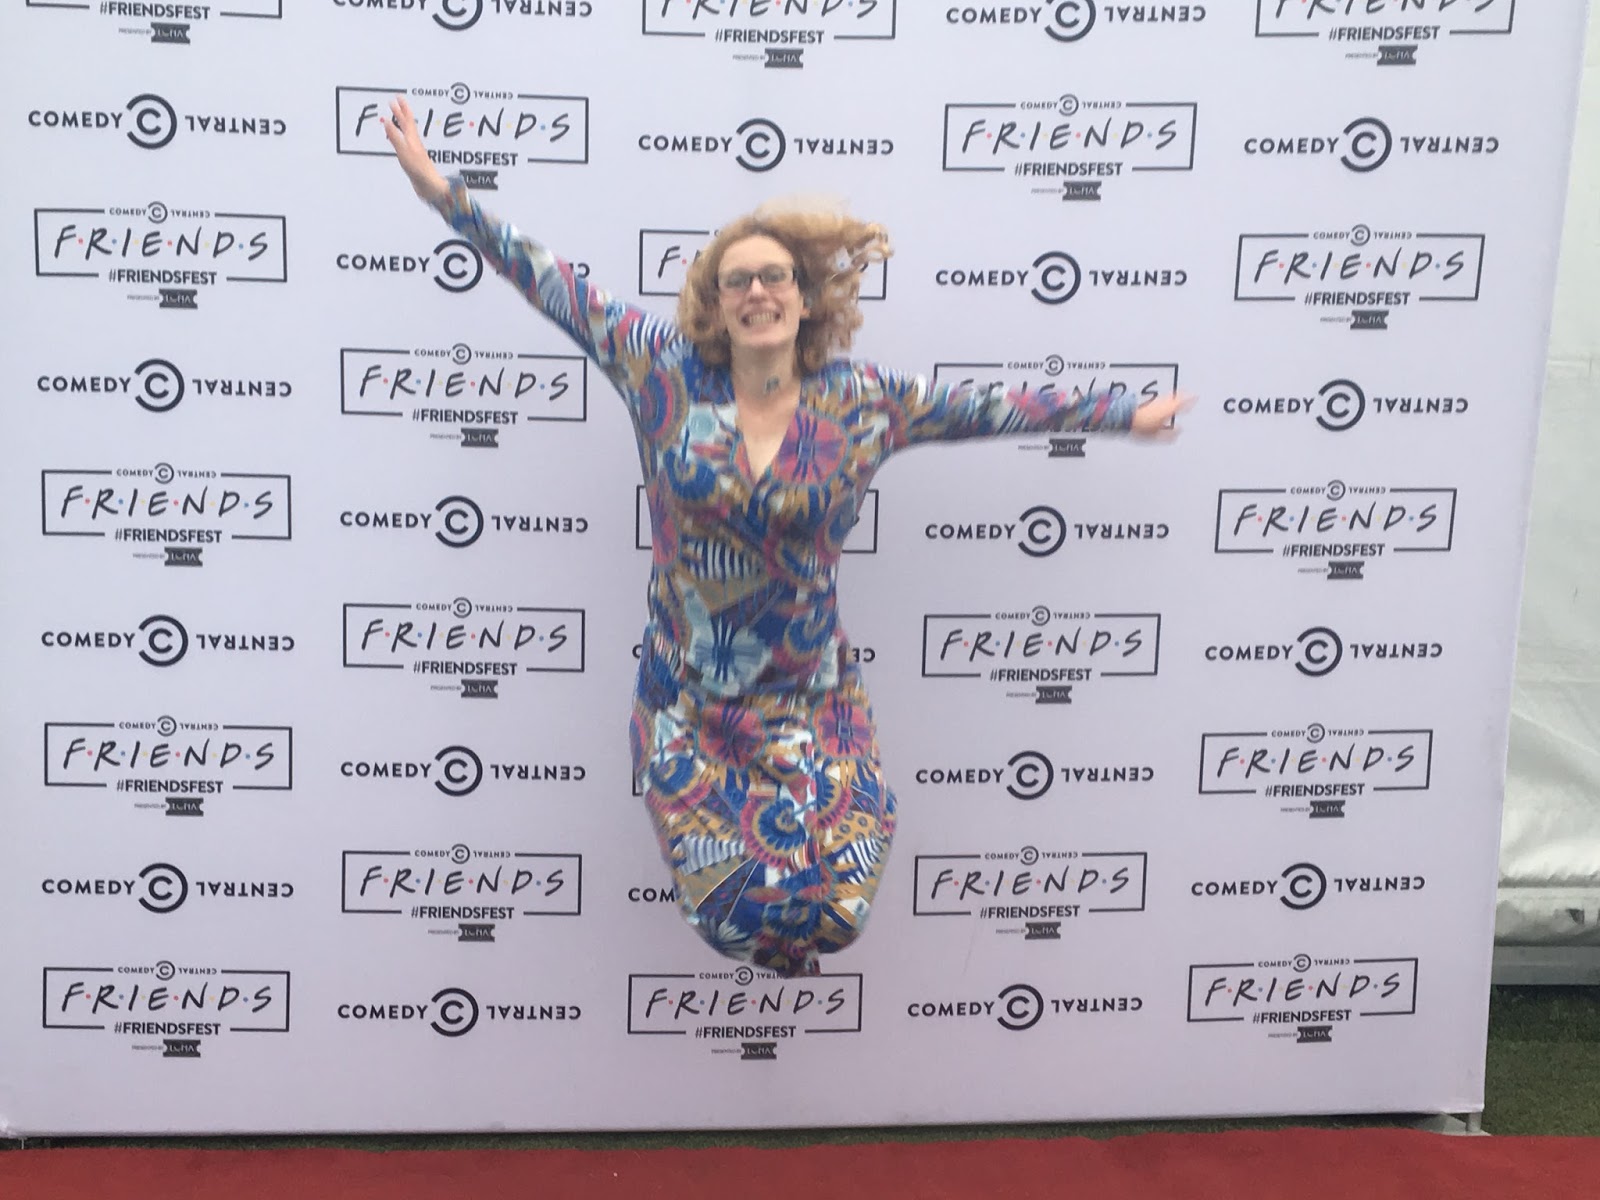
I wore it on a super geeky trip to Friends-Fest recently and it turns out its perfect for jumping in and there were no flashing issues-perfect!

Friday 1 September 2017

The year of the sleeve

I love the funky sleeves that are everywhere this year and finally hopped on the bandwagon.  I used the Sew over it Ultimate shift dress pattern as a base.  This pattern is a great base for hacking and adding flares to as its such a simple design.

I used a cotton/viscose crepe that I'd picked up in Misen fabrics on Goldhawk road.  I love the colours and drape of this but it is a total bastard to work with.  Because there's a serious crinkled texture to the fabric it has a lot of excess built in and as a result this top has ended up fairly large on me.  I have about 5m of this fabric left and think it would make a really gorgeous robe but I'm not sure I can face working with it again for a while.

I cut the top version of this pattern out as normal except that I cut the sleeves off at the elbow and made it up instructed.  To create the flared sleeves I simply cut panels the width of the fabric and eased them in to the sleeves.  This has created a lovely swishy sleeve that I am enjoying flapping around in.

Having finally made some jeans that fit, I am enjoying the whole 'jeans and a fancy top' look for a night out.  Get prepared to see some more tops in these parts!

Tuesday 1 August 2017

Being a fangirl

Sometimes I feel like this blog is basically becoming the place where I express my love for Sew Over It patterns.  Some days I feel like I should mix it up but, I warn you, today is not going to be one of those days!
I've had the silk cami pattern pretty much since it came out.  I even got round to printing at the time and then it sat in a my pattern drawer for ever, not being made up.  When I caught the end of the Liberty sale and picked up a couple of single metre offcuts, I knew it was time to break out this pattern. I cut out a size 14 overall even though at the bust the sizing showed that I would be a 12. However, I have had problems with the arm scye on a number of patterns so I decided to make the 14 overall. Turns out this was a mistake. At the top there's too much fabric. I love this top but need to decide if I can be bothered to remake the top, taking it in a bit so there's not quite so much excess fabric. 
Last month was the monthly stitch's fourth birthday and as I'm a sporadic contributor, I thought I'd like to enter something.  As the theme was 'four' so my cami with it's four pattern pieces seemed like it fit the bill perfectly.  However, in my current late to the party style, I missed the deadline so I'll have to post it as an amnesty make at some point.
I made my first pair of Mia jeans  back in April and while I love them and have been wearing them pretty consistently, there are some fitting changes I wanted to make for the next version.  There's lots of chat in the sewing world about how sewing helps with body confidence and while I love being able to make clothes that fit me properly and suit my shape, I would argue that actually sewing has made me more aware of how my body differs from others.  For example, i now know that while I have a long torso, it's the length from my neck to my waist that's longer, whereas the length from my waist to my crotch is actually proportionally short!  Hence the first alteration that I made to the jeans, which was to remove some of the length from crotch to waist.  The other alteration that I made was to make the trouser legs considerably longer as my last pair came up seriously short on me.
While I'm pleased with the alterations that I made, I did make some errors which I will need to rectify on the next version. I forgot to move the marking for the zip end so I have one very short opening to my jeans which means that they require more shimmying than is elegant to get them on and off. I forgot that my sizeable rear end needs quite a bit of fabric to cover it so I think I took a bit much out of the pattern at the back when adjusting. Also I think maybe the pocket placement could do with being moved down a smidge. 
These items have pretty much been on me or in the laundry since I made them. These photos were taken on a trip to the Isle of Wight and stood me in good stead and I'm heading off to Japan in October and I think these are going to be the base of my holiday wardrobe!

Monday 31 July 2017

Another shirt dress. Testing the Mayberry.

In my seriously sporadic blog posting I'm back, to bring you another shirtdress!  Shirtdresses have been EVERYWHERE in the sewing world this summer. I guess it's partly been fuelled by #Sewtogetherforsummer but anyway it's a craze I am happy to jump on bandwagon with. So when Jen of Jennifer Lauren handmade put out a call for testers for a shirtdress, I speedily signed up!


The pattern calls for a floaty fabric, however I had this awesome, not so floaty stretch cotton, which came from fabric godmother which I wanted to use so I went with that. I reckon that if, like me, you've got a cotton in your stash that you think this dress would look awesome in, I'd say go for it.  It actually helps the feature, off-centred front to stand out I think.  However, the bodice will stand out slightly from your body, I guess that's your own judgement call. 


This was my first experience of testing for Jen and I was really impressed by the standard of the pattern and instructions at this stage. I think most people had a similar experience with the tester version so there haven't been many changes made from the tester version.  This is one of Jen's first patterns with multiple cup sizes and I found this to work really well.  I cut a size 12 and C cup for the bodice and graded between a 12 and 14 for the skirt.  For this version I also added 4cm to the bodice, this is fairly standard for me as I have a long torso but I didn't take any length out of the skirt to compensate and the dress falls to above my knees.  I'm 172cm/5'7" so this is just something to be aware of if you're fairly tall.  A change I didn't make on this version was to lengthen the bust darts, personally I find them a little short, its really not a big deal, I only realised they were bugging me after I'd been wearing the dress for a while but I think I'd lengthen them on a future version.

The off centre neck/overlap is such a nice feature and was really easy to achieve. The buttons I used are some which I'd recycled from a moth-eaten, vintage cardigan that I'd gotten rid of a while ago. I think they work really well with the fabric, and somehow can get lost and look a bit fancy at the same time. I used a navy ribbon for the waist fastening.  I should probably mention that the dress has pockets which I totally failed to get a picture of but they're definitely there.  To be honest, I know everyone raves about pockets in dresses but I really am not a massive fan.  On the rare occasion when I remember I have them and actually put something in them, the dress gets all lumpy and lopsided.  I might rebel next time and not include them!

I really like this dress, I think it's super practical and fun too.  While I took these photos ages ago, I've been wearing this exact outfit all day (except with a cardigan over it as the UK hasn't decided to fix on a season at the moment!)  I definitely think I'll make another slightly more wintery version with longer sleeves.  I love Jen's versions in solid fabrics, which allow the off-centre front to stand out.  So, you never know, I may break the habit of a lifetime and opt for a plain fabric for next version!

Friday 28 July 2017

A long time in the making!

Today I have two projects to share that have been a really long time in the making.  The first up is a Sew Over it Vintage Shirt dress which is my latest Sew Crafty Design team project.  However, I ordered the fabric for this months ago and have only just got round to making it.  It's been a super busy few months and I'm happy I can now celebrate the end of them with a new dress.


This is made in a dashwood quilting cotton from the altitude collection at Sew Crafty.  This is a really gorgeous range of cottons which are perfect for a dress like this.  For years I mainly bought cottons like these as they are so easy to work with and come in amazing patterns and colours.  Then I moved away from them to other fabrics as I expanded the range of what I could sew and my stash was surprisingly low in this kind of fabric.  I really must rectify this as I do really enjoy working with them.


This is my fourth version of this dress (I really love this pattern) so I have the fit changes sorted by now, although I did have a few other changes that I made. I hadn't ordered quite enough fabric so I made a couple of adjustments; I made the shirt a smidge narrower and made the sleeves short rather than 3/4 length with a cuff.

I then ventured out into the rain to take some photos which was much rougher on my photographer than on me, so thanks Nini.

The Julia cardigan was circling the blogosphere a few years ago and when I checked my harddrive, I've had it stored for 2 years without ever getting round to printing the pattern and making it.  Part of the reason for my lack of action was the difficulty in finding the right fabric.  I really didn't want a polyester cardigan which ruled out a ponte or something similar.  Also as I really feel the cold, I wanted something with a wool content rather than just cotton.  Anyway, a few weeks ago I found the perfect black wool jersey in my local fabric shop and as my trusty RTW black cardigan has started sprouting holes, it felt like fate!

Cardigans and jumpers are still the items that I've made very few of and don't see all that many patterns for, but I'm so excited I finally found the right combo!  This is such an easy pattern to put together and so speedy, I cut it out one evening and by lunchtime the next day, I had a new cardigan.  The only thing I don't like about the instructions is that is isn't clear that so much extra fabric is needed for the doubled over cardigan and I did not have enough fabric to do this.  It's not a big deal in this black fabric as very little is visible but in another fabric I think I'd prefer to have the doubled over collar.


So although the weather in the UK is grim at the moment, its still too warm for this cardigan really, which is perfect as it means the wool is doing its job.  Winter Alexa will thank me.

These items are my entry for one of the monthly stitch indie pattern month challenges  and I'm so pleased with my outfit.  

Sunday 28 May 2017

A vintage outfit!

A couple of months ago the lovely ladies at SewCrafty asked if I'd do a hack of their shift dress pattern and sent me some gorgeous materials to do it with. However my version did not work at all so I threw it in the corner and sulked for a while.

And then I came to my senses and realised that I wanted to do something with the altitude bird cotton that SewCrafty had sent me so I decided to refashion it into something that I would actually wear. Enter this vintage summer blouse pattern from 1982 (apparently this is the year that I sew the 1980s!).  I hummed and ha-d over what size to make and luckily I had decided on the size 12 because when I got it out of the packet this size had already been cut out. I'm not sure where I bought this pattern from, I'm going to guess it was part of a job lot on eBay but I guess I'm lucky that my size remained in tact.

I'm not really a fan of ruffles but they've been popping up everywhere this summer and I thought the ruffled version of this looked cute without being too OTT so I gave it a go. Although I used some little flower buttons from my stash so I wasn't exactly trying to move too far away from the 'cute' factor!  The ruffles were made from some scraps of a cotton linen blend that I had in my stash.


I want so many versions of this top! I've been searching for a good shirt/top pattern for ages and this might be the one! Although I wish it had a sleeved version as in it's current form, it's only good for summer. However hopefully we've got months of summer left so I can enjoy this for a while.


The shirt was worn on holiday with a new pair of Megan Neilsen Flint shorts.  I seem to have become a little bit obsessed by this pattern.  Personally I think this is a super cute look and is also giving off more 1930s vibes. I made the shorts from a scrap of denim that I had in my stash, that I think my mum donated at one point, and some scraps of stretch cotton.  I also used 2 vintage buttons also from my stash. Basically, these were a great stashbuster!


I used red topstitching on the denim and navy topstitching on the waistband and for the button holes. I have done a lot of topstitching recently and I think it adds a really nice detail but maybe it's time to give it a rest now!  I'm actually wearing these shorts as I type, since the weather in the UK has decided that it's properly summer.  I hope you all have a lovely weekend in the sunshine!

Saturday 13 May 2017

Me-made-may final round up

So having sworn that I was going to document me-made-may on the blog, May rather got the better of me.  I did take photos (mainly) which I put on instagram, so here a little late is my round up!

 Day 11. A rtw leather skirt and my liberty Mathilde blouse. While I love leather skirts, wearing this now scarce rtw item in my wardrobe reminds me why I sew! I fits so badly.
Day 12. Sew Over It Alex shirt and Mia jeans!
Day 13. A new Flint and Flora jumpsuit hack. More details will be coming soon.
Day 14. Mia jeans and plantain t-shirt.
Day 15. Sew over it ultimate wrap dress (unblogged) I like the concept of this but it needs a number of adjustments which I find frustrating when I wear it.  It's starting to become apparent how I have started blogging only a fraction of the things that I make!
Day 16. I forgot to take a picture but I wore my Jade skirt and a sutton blouse
Day 17. Flint/flora jumpsuit again

Day 18. Sew Over It Vintage shirt dress
Day 19. A Jade skirt and 1980s jumper, actually wearing these made me realise that both should go to the charity shop as the skirt is too short and I don't like the fabric of the jumper.
Day 20. Nettie dress (unblogged and unphotographed)
Day 21. I didn't manage to get a photo and I don't remember what I wore
Day 22. Super colourful ultimate trousers and a bronte top.
Day 23.  New Alex shirtdress (blog post to come)
Day 24.  Deer and Doe Belladone to do my doctoral viva!
Day 25. Deer and Doe hacked Belladone top and ultimate trousers
Day 26. Lady skater dress (unblogged) to celebrate passing my doctorate thesis and viva!
Day 27.  Flint trousers and new vintage top (blog post to come)
Day 28.  Alex shirtdress
Day 29. No photo
Day 30. Flint trousers and Angelica top
Day 31.  Worst photo of the month!  Vintage maxi skirt and lace Belcarra top.

Right so that's May wrapped up for another year!  This was definitely the year where I've struggled least to pick something to wear every day.  I love all the basics that I've made and love that I've managed to fill some (but not all) of the gaps.  Having a handmade wardrobe is great and the longer I sew, the more pieces that I think fit with my style and are well constructed and I find this immensely satisfying.  I hope you all had good me-made-mays.  

Sunday 7 May 2017

Me Made May Days 1-10

I contemplated not blogging about Me-made-May this year as I'm doing daily photos on instagram but then I realised that even if no one else reads these posts as they are repetitive, I love having my previous years documentation of what I've worn each May and the reflections of my style, life and the weather that they represent.  So without further ado, here's what I wore at the beginning of May 2017.

Day 1

My Mia jeans, stripey Dolores top and owl jumper for a walk up Boxhill with my sister and a friend.  A lovely bank holiday start to the month.

Day 2

Refashioned Galaxy dress and vintage jumper for a day at work

Day 3

 Vintage jersey dress, belt donated from my mum and RTW cardigan for a day at work and dinner out with friends.

Day 4


I failed to get a photo but I wore my ultimate trousers for a day in uni

Day 5

 Ultimate trousers and embroidered top for another day in uni and dinner with a friend.

Day 6


A Saturday spent fabric shopping makes me look this happy!  I wore a Sutton blouse (unblogged) and my spotty woollen skirt.  This photo was taken approximately 5 mins before I spilt food over me!

Day 7

I wore my new Flint trousers and my vintage coat to go visit an exhibition and the Crossrail garden at Canary wharf.  I have been wearing this coat all week, I'm glad I got a photo with me wearing it.
Day 8

Pleather circle skirt, I love this skirt but the fabric was pretty crappy quality so it's looking fairly battered now. Liberty Mathilde blouse and rtw cardigan. Even with my vintage coat, I was freezing today. Temperatures were distinctly un-spring-like! This may be why I look quite so grumpy in this picture, although I suspect it's more a sign that I needed to go to sleep!
Day 9
African wax print vintage shirt dress. This may be one of my favourite things that I've made. Its got some of my favourite colours and is nice and bright while still being smart enough for work.
Day 10
My Flint trousers with a thrifted top and cardigan. Just warning you now, these trousers are going to feature a lot this month. I'm in love and am already working on 2 other variations! 

Anyway, life got super busy again so sporadic blogging will be resumed. Follow me on instagram for (slightly) more regular updates, I'm @almostahippy. Have a lovely weekend folks.

Sunday 30 April 2017

Rocking the 1930s

As soon as Megan Nielsen released the Flint trousers I bought them. I just loved the style and the details and I had to have them!

I'd never actually made one of Megan's main patterns, although I have made the free Veronica circle skirt a couple of times; here and here. I was interested to see how the pattern came to together and how clear the instructions were on a more complex pattern. I was impressed! The whole thing was a breeze to put together, although really the only complicated bit is the opening.

I made this in some unidentified fabric that was a gift from a friend of my mums. I'm not a 100% sure it's a dress making fabric but so far it seems to be working. I cut a size x at the hips and size x at waist and it fits perfectly.  I so into making trousers at the moment.  For years I gave up on wearing trousers, mainly because I couldn't get ones that fitted.  It's so much fun being able to include trousers in my wardrobe again.
My mum and sister both had the same response to these; that they liked them but that they should be an inch or two shorter.  Actually I think the pattern might be meant to sit at about this height so maybe they have the designers eye!  Update-when I washed these they shrunk upwards so they are now a couple of inches shorter, hows that for the ultimate lazy fix!

I wore these on a trip to Eltham Palace with a friend a couple of weeks ago, it is the most incredible house done in 1930s art deco style.  I completely fell in love with the lobby of the house and have decided that if I ever get married, I want it to be there (although I say this every time I find a beautiful venue).
How awesome is this???
 And these doors!

Anyway we found some opportunities for dressing up and I tried on this gorgeous hat, which made me want to run out and buy one to wear on a daily basis.  This whole visit completely reaffirmed my love for the 1930s and when I got home I had a little search for some 1930s patterns.  I did not find any that I could actually afford but I realised how period appropriate my outfit for the day at Eltham Palace had been!

Anyway I loved the Flint trousers so much I've got plans for several more, including a jumpsuit hack for an event I'm going to next week so watch this space...