Tuesday 30 October 2018

A very special Anna

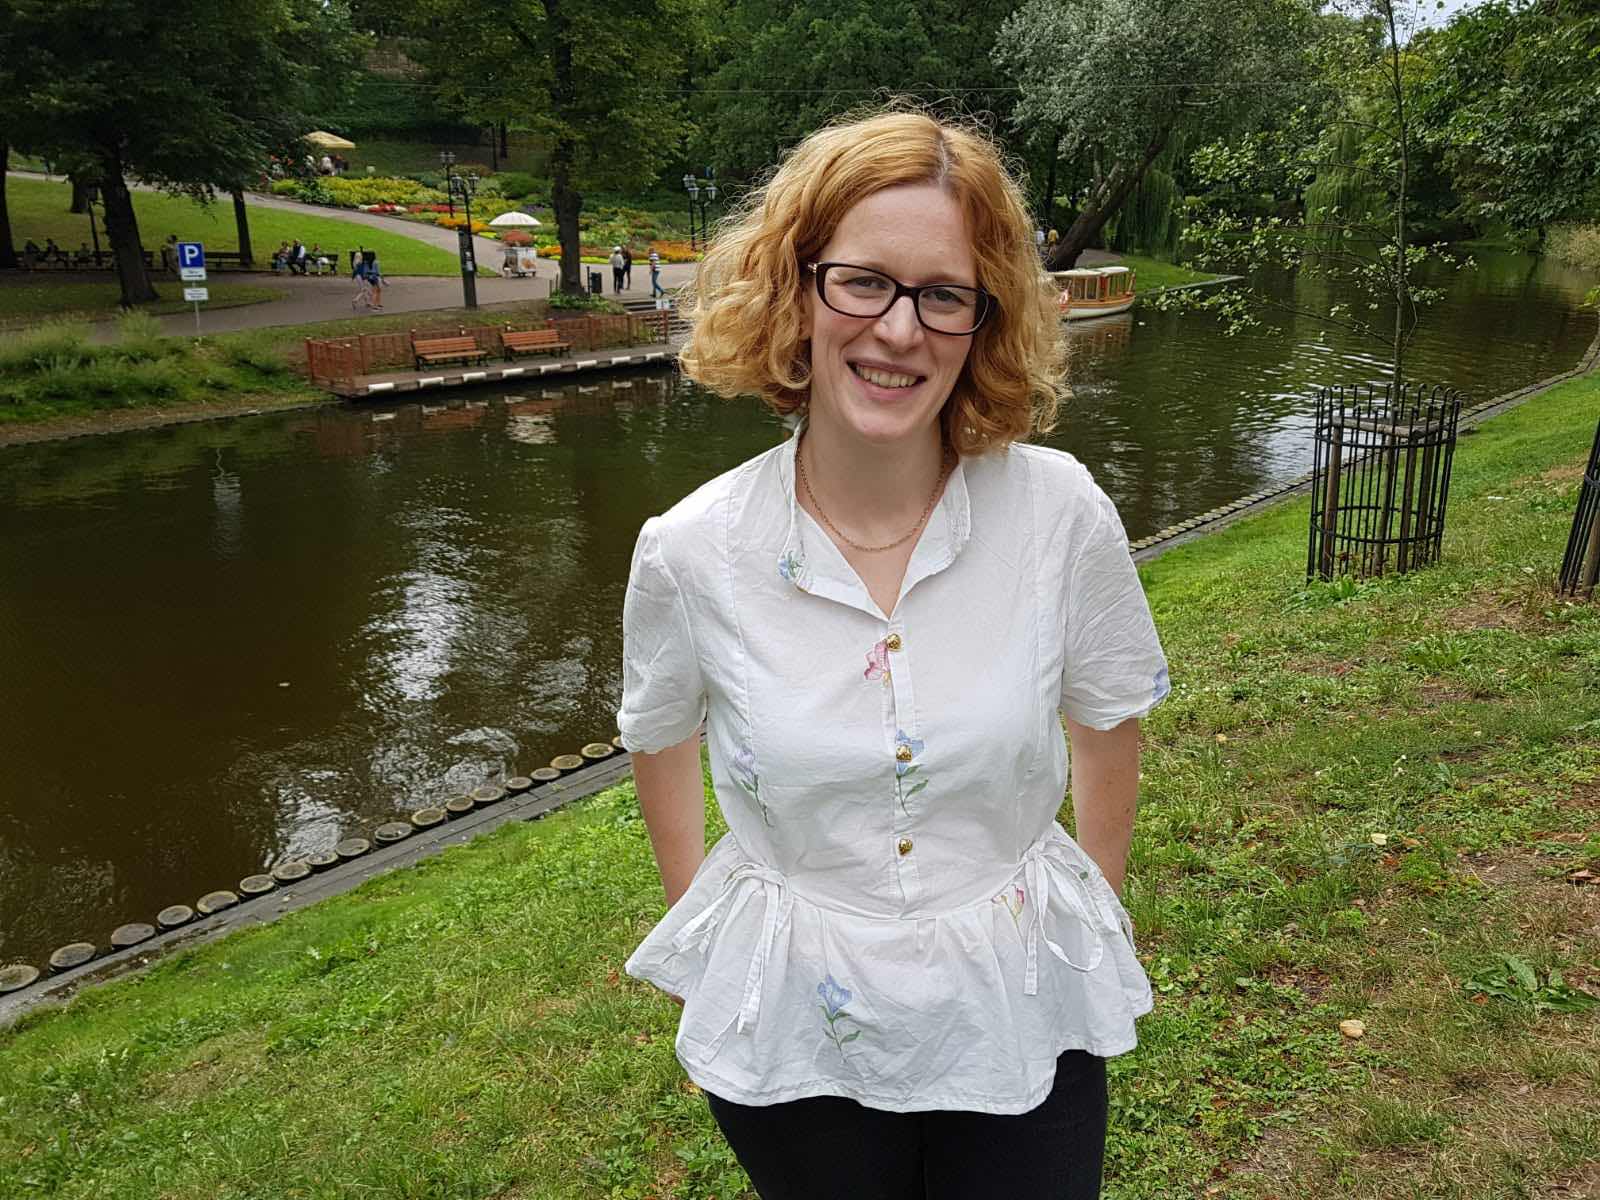
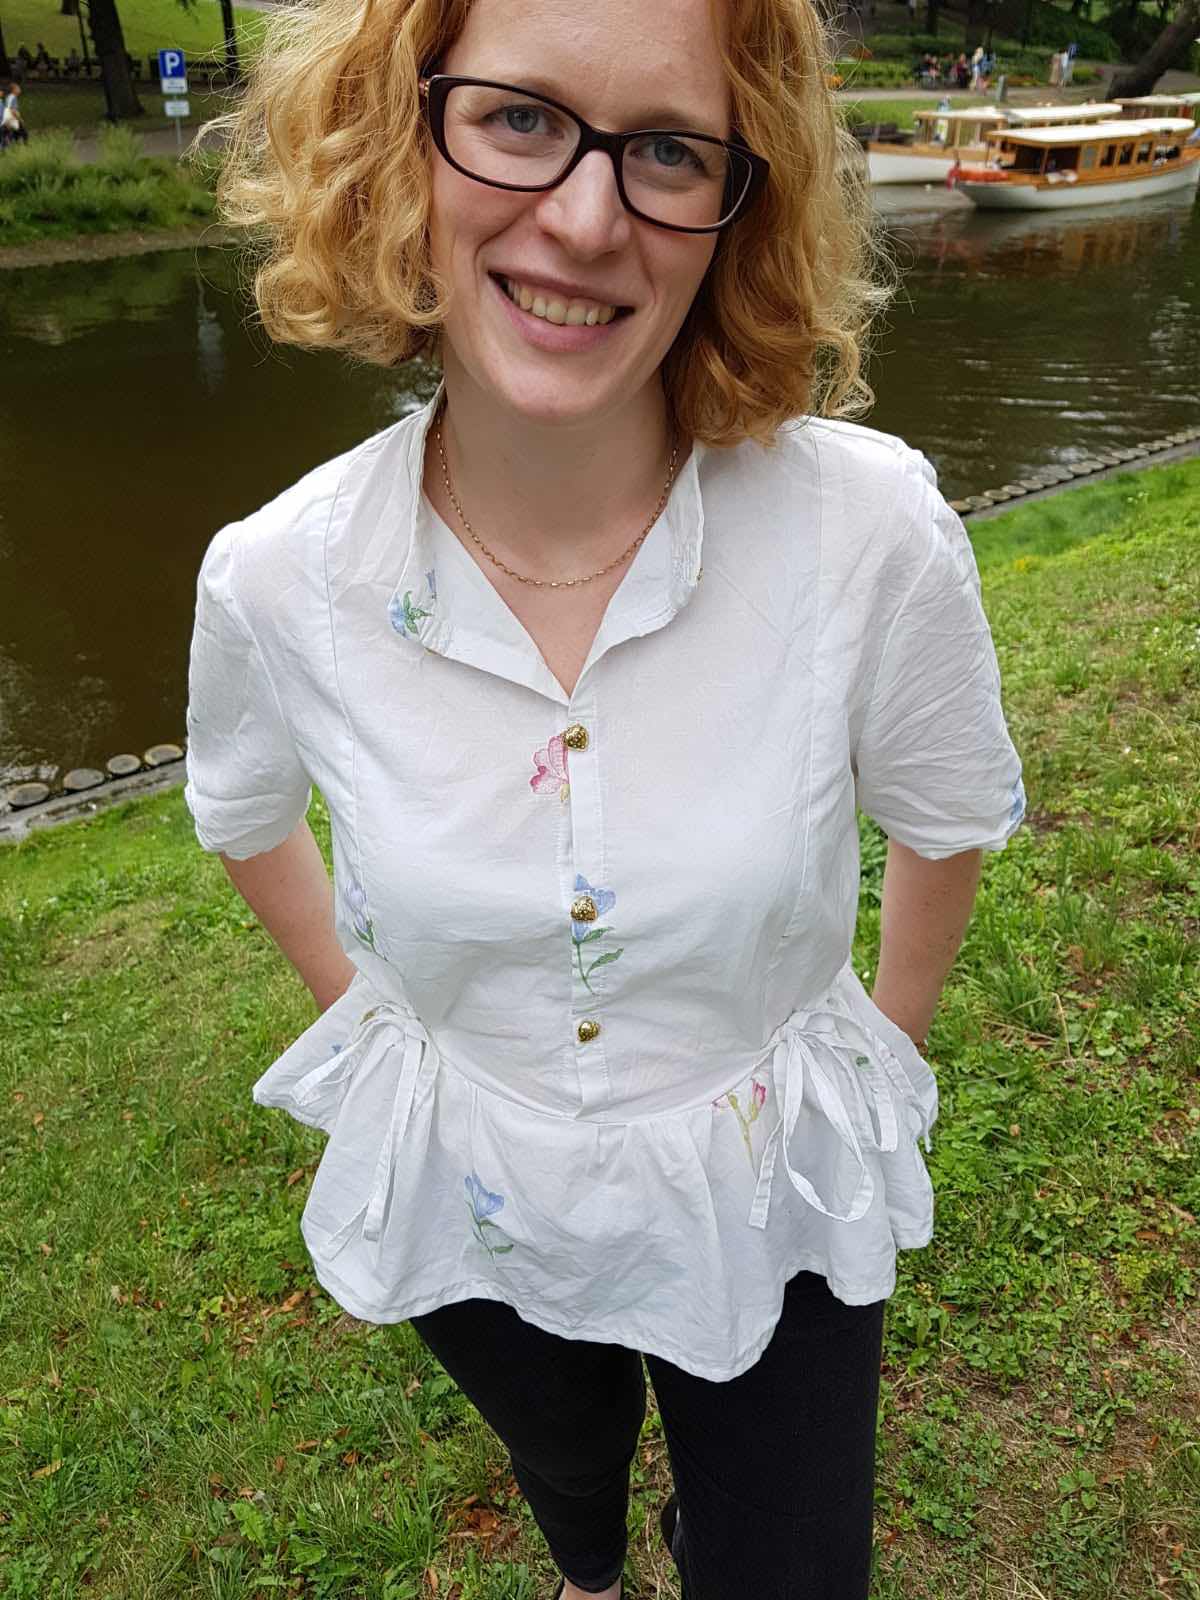
Today’s dress is a bit special to me for a number of reasons. Firstly I made it to wear to the wedding of a my good friend, Katie and it was lovely to have a special dress to celebrate her special day in.  Secondly, I made it in some great fabric I bought in Japan last year.  I have no idea what I was planning to made with this when I bought it, as I purchased 5m which is more than I would usually buy without a plan, however, kudos past Alexa for making good choices! 
 
 
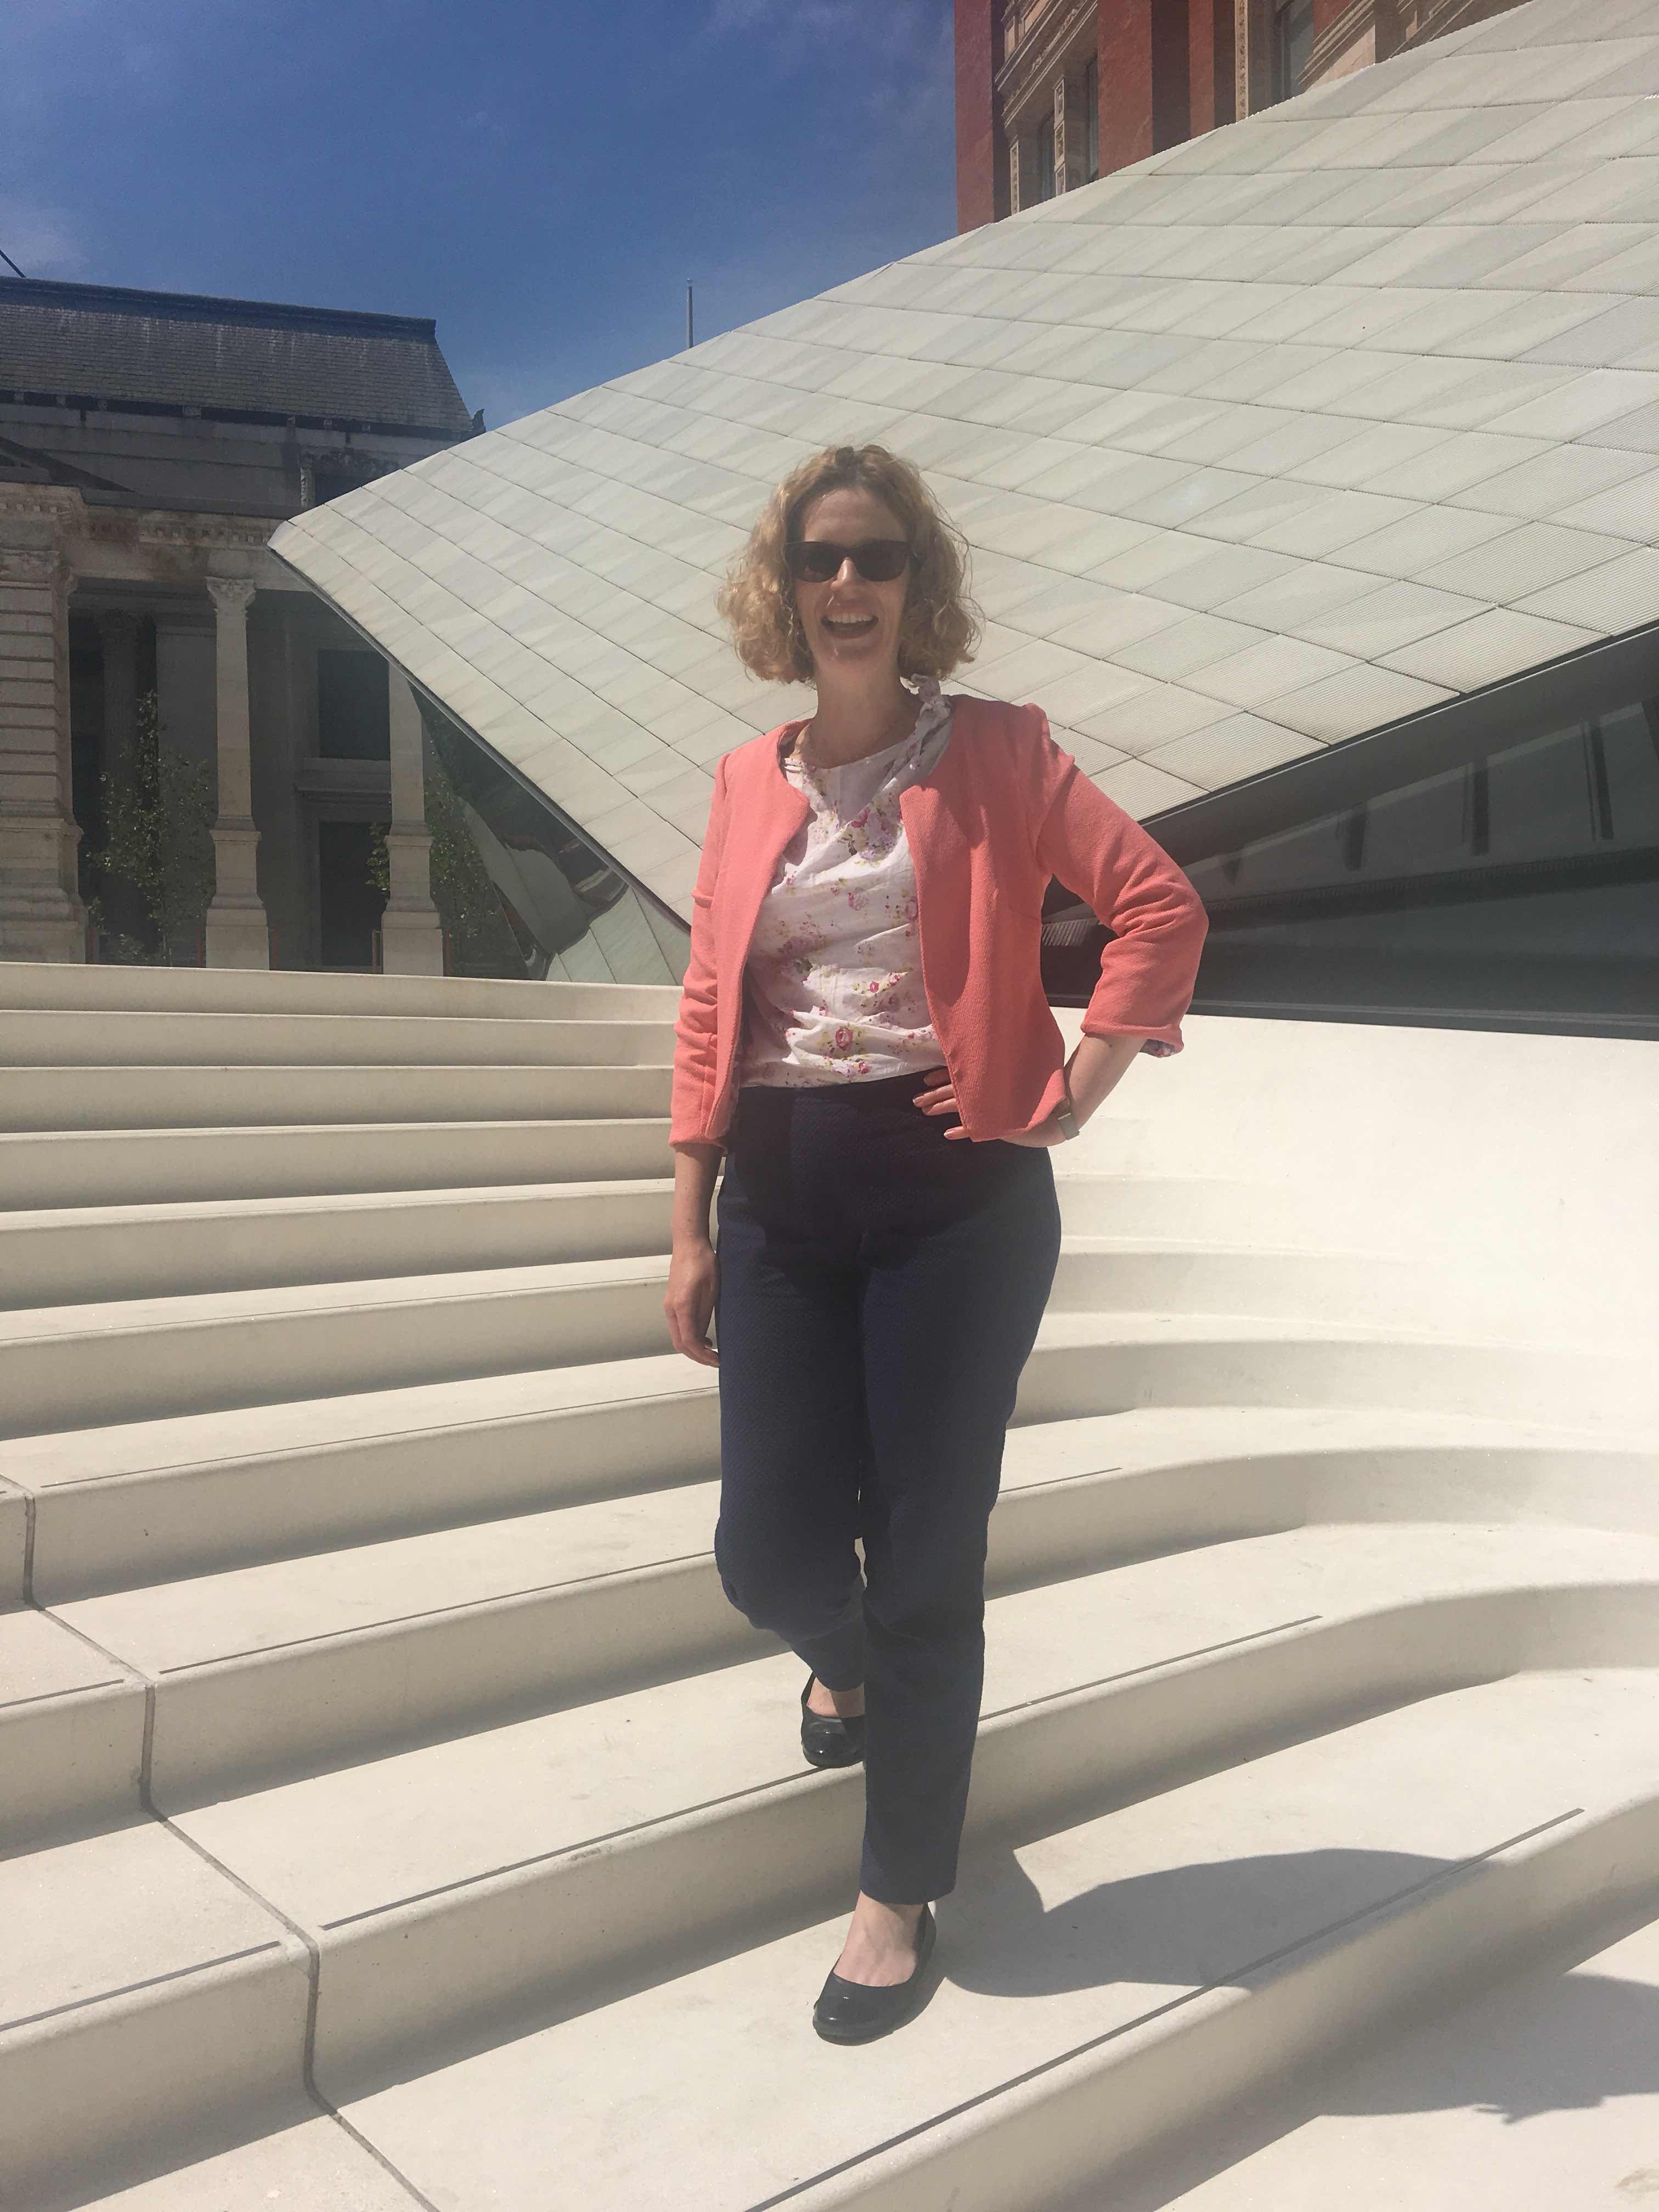
The dress is of course the Anna dress, isn’t it funny how when you make up a pattern that you love you instantly want to make it again.  I haven’t made an Anna dress in a couple of years and now have made 2 versions in the space of a few weeks!  The first version of the Anna that I ever made was the maxi version and I loved floating around in that dress so much, sadly it completely disintegrated as it was made from a viscose that frayed like crazy and I made it before I had an overlocker.  I can’t believe it’s taken me so long to make another to replace it. 
 
 
 Apart from the back alteration that I’ve talked about in other versions, I made the pattern up straight from the pack.  I always find it hard to believe when a dress pattern says it needs something like the 4.5m required for this dress, particularly as I’m usually quite economical with my cutting.  However, a maxi dress with gored skirt really does!  I only have some scraps left over from my 5m!
 
 
 The fabric is a cotton of medium weight and so was a total dream to work with and there'll be no fraying issues with this baby!  I feel that this is a good use of my Japanese stash and I think I'll get a lot of wear out of this once we return to my preferred summer season! 


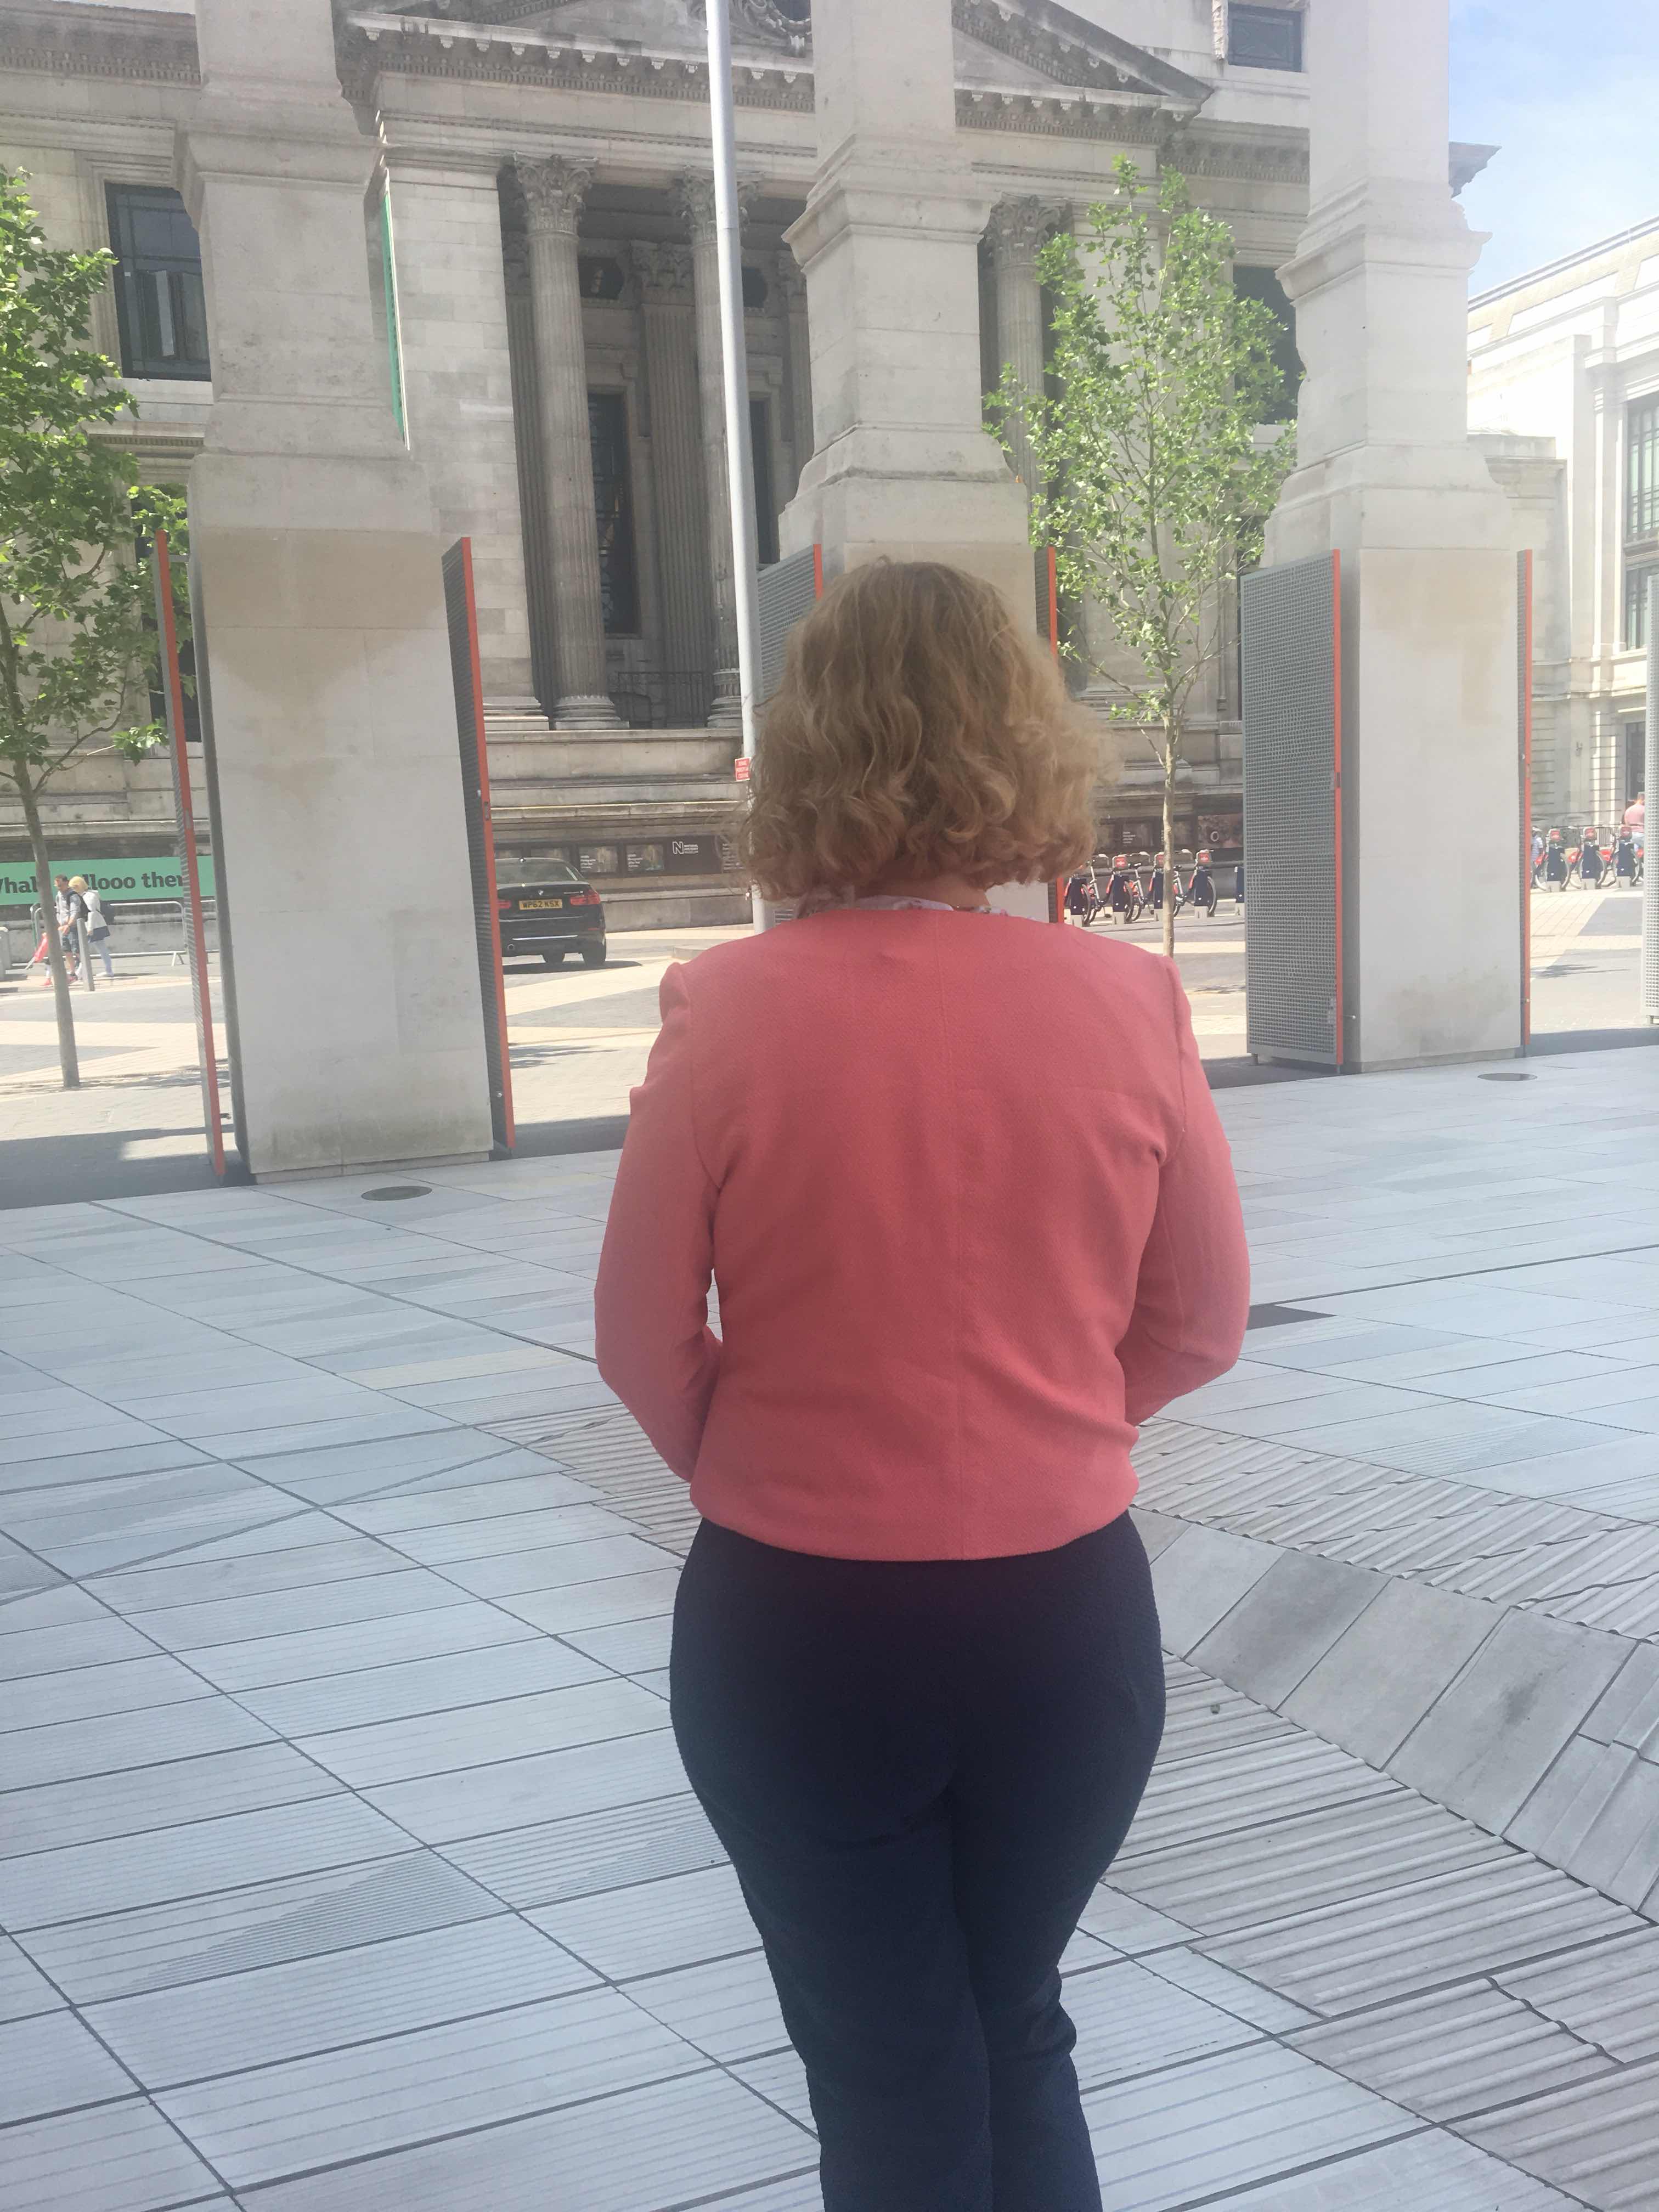
The pictures are courtesy of my friend Dominika who is obsessed with photos and getting the perfect photo.  When she makes me take her photo 10 times or makes me pose for mine forever, I whinge a lot but then she get such good results that I really shouldn’t be such a brat about it. 
Thanks Dominika!
The dress was a bit of a last minute scramble as I had a few other things to do for the wedding such as make the veil!  This was a really fun project and it was lovely to feel that I was doing something important for their big day.  It involved a lot more hand sewing than I would usually sign up for and I forgot to get a picture!
What a lovely couple!  I'm definitely glad that I got to be part of their special day and had something to wear that felt appropriately special.
 

Sunday 21 October 2018

Around the world

It's Indie pattern month over on the monthly stitch, which is one of my favourite sewing events of the year as I always discover new patterns and designers and see great adaptations of patterns.  This year one of the themes was 'around the world' which meant that you had to sew a pattern by an Indie company outside your own country.  I thought this was a great challenge and really pushed me out of my comfort zone.  I'd assumed I sew lots of patterns from different pattern companies around the world and while this is true to an extent, there is a big slant towards UK pattern companies, the patterns I've made over the last few months have been from Cocowawa, By Hand London and A LOT of Sew Over It.


Anyway I consulted my pattern stash and pulled out the Waffle patterns Vanilla top.  I discovered this pattern company through a previous years indie pattern month, see an interview with the designer here. I think I bought this on black Friday last year so it's nice to finally get round to using it.


I used some jersey that I bought in Japan last year.  It's a nice symmetry to use a Japanese fabric for a pattern from a Japanese designer.  While Japanese designs always look so cool, the lack of fitting and defined waist line means that they're not usually my style so this was also my first venture into Japanese style patterns.


The front and back pattern pieces look crazy when they are laid out on the fabric, which was kind of exciting because it wasn't like anything I'd ever sewn before!  The instructions were good and I thought the design of the neckline binding was really good and gave a nice finish for a V-necked top in jersey.


However, I do think the sizing is bit off.  I made the jumper true to my measurements and I do think it's a bit too slouchy and oversized and because of the unusual shape, I'm not entirely sure how to fix it!  I have worn it loads since I finished it though so it clearly can't be bothering me that much!


Saturday 6 October 2018

An oldie but a goodie

With this make I've returned to an old pattern that was everywhere in the blogosphere at one point and I've already made several versions of, a couple of versions here and here.  It is of course the By Hand London Anna dress.  Despite having made this dress a number of times, I have never made the V-necked version so it was nice to try something new while still in the realm of the familiar.


The fabric I used is one of a pair of sheets I picked up in a charity shop a few years back.  I used one of them to make this vintage shirtdress.  Unfortunately as it was my first version of the shirtdress, it was a bit short in the torso and while I loved it I was never that comfortable in it so eventually donated it.  On the plus side I had plenty more of the fabric which I loved so time for dress number 2 from a sheet!  I started my dressmaking journey with a lot of refashioning projects and while I now buy a lot of fabric, I love when I am able to return to some refashioning and to pursue my hobby a bit sustainably.


I always feel like the Anna bodice is a bit short on me (spot the long torso theme) so I lengthened this one by about 5cm.  It may have been a cm too much but I'm not going to get too picky about it.  With my last Anna dress I had made some alterations to adjust for gaping in the back which I did again this time.  I also decided to add a pleated skirt for a slightly different look and while the calculations behind pleats always defeat me (and I'm usually good at maths!), I got there in the end and really like the finished look.  Despite the pleats, this was really a very quick and satisfying make.


It was really nice to make something up that I'd made before and could be fairly certain was going to work well.  While it's always lovely to get a new pattern and try out new things there is something wonderful about returning to a TNT pattern. 


Sunday 30 September 2018

Last of summer sewing

I took these pictures on a recent trip to Hong Kong where my clothes were totally weather appropriate but now I’m back in the UK they feel totally out of sync with the weather and the autumnal sewing that everyone is doing now.


I’ve got a duo to share today. When thinking about what I wanted to wear when away in hot and humid Hong Kong I knew I wanted to make a sew over it silk cami in a breezy fabric and some more Megan Nielsen flint shorts.


The pair of flint shorts that I made last year got so much wear that I definitely wanted a new pair this year in a slightly more neutral colour to go with everything. This pair are made from some black cotton that I had in my stash and were perfect for sightseeing in and going with everything else I’d brought with me. I made the tie closure version and made no alterations. Basically I have nothing to say about these, this is maybe my 6th pair and I can just crack them out and fall in love! A couple of previous versions can be seen here and here.


The silk cami is made from an old Hobbs linen skirt that my mother donated to my stash a few years ago and so is also a refashion.  The skirt was cut on the grain so could basically just be used as a length of fabric. I harvested the zip for my stash too.  Have you all been keeping track of the fabulous refashions happening as part of the refashioners series?  While it's nice to be doing a refashion alongside the rest of the community, this one is no where near as inspired as the other garments in the series.


I’d made a couple of silk camis before but found the fit a bit odd. It’s got quite a loose fit but was tight across the bust. With my decidedly average C cup I’d never had to do an fba before but being no time like the present, I consulted the blogosphere for the knowledge.  I found this post and this post helpful but since neither of them quite covered what I was doing, I'm not entirely sure that I've done it correctly.  I wanted the final top to have a bust dart so that the top didn't end up too shapeless, however, with the adjustment I have ended up with a much roomier top, so for my next version, I will take it in at the sides.  It does fit much better across the bust now though.


What's kind of mind blowing about refashions is how little is left over when transforming what seems like a bigger garment into a smaller one. There were really only a few scraps left over from the skirt when I was finished with this.


For more outfit and Hong Kong photos, please follow me over on instagram @almostahippy.  Have a good week.

Monday 3 September 2018

Sweet as honey

I really loved the honeycomb shirt and dress by Ana from Cocowawa when it was released but I attempted to resist buying it as my sewing output has reduced and I’m so I’m attempting (and failing) to reduce my fabric and pattern buying too.  However, there were so many gorgeous versions popping up on my instagram that I couldn’t help it.  I love a shirtdress, they must be among the most worn items in my wardrobe so the fact that this pattern offers a dress and top versions is a real bonus.

This was my first Cocowawa pattern, while I love some of her other patterns, they are a bit too casual for my mainly work wardrobe, although the Chestnut gives me all the heart eyes and is seriously calling to me.  I was really impressed with the pdf, it seemed to have be planned with economy of paper (and sticking time) in mind and is only 28 pages for all the different versions. 


I made up a size 4, grading to a 6 over the hips, as per my measurements and found it to be pretty accurate but this is a loose fitting top.  I used the remnants of an old duvet cover that I had bought in a charity shop and used to make my vintage halter neck dress.  I found the instructions for the most part really good.  Everyone has been raving about the burrito method for closing the yoke but I wasn’t paying attention at this point and so just stitched my yoke shut and finished it in the way I would any other seam so mine is not so pretty on the inside.  The only thing I struggled with was buttonhole on the mandarin collar, I was struggling to get a neat buttonhole on the collar because of the fabric bulk and then I realised that it wouldn’t close over the other side properly even if I got one so I simply decided to sew buttons on both sides of the collar and call it a feature.  I had a little look on instagram and there seems to be a mix of buttonholes and no buttonholes on the collar so I don’t know if that’s something I fluffed or not.


I love the bow details and can’t wait to make a winter dress complete with the sleeve bows too!  When we were taking these photos, I realised I have a gaping problem between the buttons.  It’s not going to bother me enough to do anything about on this version but on a future one, I think I’d add in more buttonholes, I have space for them as I lengthened the bodice so I could definitely get away with one more.  I used these super cute little strawberry buttons from my stash, I bought them on a market years ago but I don't remember which one. 

Although my face seems huge in this photo, it's probably the best photo of the top so I'm just going to have to deal with looking like a bobble head doll! 

I really recommend this pattern and am looking forward to future versions becoming part of my shirtdress wardrobe!


Thursday 26 July 2018

Expressing my love for the African wax print


Today I have a very colourful dress to show you.  This is my fourth African wax print dress and each time I wear the others I swear that I'm going another as they make me so happy.  I feel like they fit my style well as they are colourful without being novelty and I also love the great interactions I get with other people when I wear them.  People come up to me on the street or the hospital that I work in and talk to me about the prints which is awesome as Londoners tend not to do that often.


I used the Sew Over It Ultimate shift dress pattern.  I've made this pattern so many times but I'd never made the frilled shoulders before as I'm not a massive frill fan but I don't know what got into me and I just went for it and I'm really pleased as these frills I love. 


Despite making this pattern a lot of times, each time I do, I think that I need to lengthen it.  I think I forgot because several of them are winter versions that I wear with tights.  However, this is definitely a summer version and it feels like it should be a smidge longer.  However its been doing me well in this heat wave we've been having. 


And just because if there's ever a giant pink flamingo around you, you should definitely give it a cuddle, particularly if you're wearing a dress to match!


Friday 13 July 2018

Starting to feel a bit put together

Today I have another double act for you, however this one worked out just as I planned. Another pair of Sew over it ultimate trousers and a Schnittchen patterns Coco jacket. The jacket was a new make for me and it was good to push myself out of my comfort zone. 


I’ve made at least 5 pairs of ultimate trousers and I love them but I don’t have a lot to say at this point about the construction. This pair were made in a textured cotton from Simply fabrics in Brixton. I spotted it on my last visit there and fell in love instantly, I had it made up into these trousers within days. 
 

Before I launch into a critique of my new jacket, I should say that it was always meant to be a wearable muslin and as that I think it’s pretty good. 

  
I’ve had this pattern in my stash for years! I won it as part of a monthly stitch competition at one point and never got round to making it. I’ve always had a cardigans and jackets gap in my wardrobe and really wanted a jacket in this style but it just felt like it was going to be too difficult. 

 
However I recently managed to psych myself up to just do it! I decided to use 2 fabrics from my stash that I wasn’t too precious about as a way to not get too uptight about how to make it perfect. I think I received the pattern before they had English instructions, either way there were no instructions with the pattern so I was reliant the tutorial on the blog.  Most of the construction was fairly straightforward but I struggled with attaching the lining around the back hem and it keeps rolling out of the sleeves (although this may be because of the outer fabric).  


I didn’t make any alterations to the pattern and made it up as instructed.  For the most part, it fits really well but the arms are too tight.  I'd seen other people on the blogosphere commenting on this but decided to give it a go, as drafted, for this wearable muslin.  I really like this jacket but it's unlikely to last me more than a season, the outer fabric is a cheap polyester, that I bought on Walthamstow market and used some of for the lining of this coat and the lining is a viscose from Minerva crafts that I bought on sale and then thought was a bit garish for a dress.

Despite the flaws, I love this outfit it makes me feel really put together.  I have worn the jacket with almost everything since it was finished and definitely need to make another one.  I've already bought some fabric, anyone want to take bets on how long it takes me to get around to actioning this?
 

Monday 18 June 2018

When things don’t work out the way you planned

Todays makes were ‘made’ a couple of months ago but somehow took another couple to actually feel properly wearable and be photographed.  However, you're getting a bumper set of makes!  For this Sew crafty design team project I had a really clear vision of a Nettie dress in this gorgeous monochrome jersey with a mustard Coppelia cover up in this jersey. However, the even the best laid plans don’t always go as planned.  


First up is the Nettie dress. This pattern has got to be one of my most used patterns. I reckon this is at least version 10, I’ve made it, I’ve hacked it, it’s great. However, in some fabrics, I really need to go up a size in the hips/lower stomach as I could do with some more wiggle room. I’ve become a lot more self conscious about my stomach recently and sadly when I wore this dress during me Made May I just felt too uncomfortable. I knew I just wasn’t going to wear it after that and so started to think about what to do to rescue the fabric which I loved!  It really wasn’t the biggest leap to cut it shorter into a top.
 

This top works really well tucked into trousers or skirts and I’m glad I was able to rescue the fabric as I just love the print.  It’s also made me realise that the one version of the Nettie that I’ve never made is the body suit! One to go on the list! 
 

The coppelia cardigan has been on my to make list for the longest time. However, when I was making it up I really struggled with instructions. I’ve gotten so used to indie pattern instructions being super clear that I was really disappointed by these ones. At times they really had me scratching my head.  I've had so many people tell me recently that the instructions for papercut patterns are so good that I was starting to feel particularly dim, however, on reading through some more blog posts about this pattern, others seem to have struggled in the same areas. 
 
 
I made the cropped version but lengthened it a little as I have a long torso-turns out that was a mistake! I should have left it alone as it’s now slightly too long. I’m also really bothered by the seam line right in the middle of the ties. It feels like a sloppy design but I don’t know if I put it on incorrectly as I've been stalking other people's versions and they don't seem to have this issue, or if it's a design or instruction fail.  I feel like this join should be at the side and I'm trying to decide if I can bother taking it off and reattaching where I think it should be.  

 
I’m not sure what the fabric content of this jersey is as it’s not stated on the site but it’s really drapey and feels lovely. I’m not sure if it was the greatest choice for this top. It may be a little too drapey, it may have worked better in something with a bit more structure. I'm still undecided about this cardigan, I may make the adjustments and I may even make another to fully decide but at the moment it's not love!
 
 The sew crafty shop has recently started stocking all the rainbow colours of fold over elastic which got me a little bit excited as I could then make knickers out of the jersey scraps I've got knocking around!  I used the Jennifer Lauren Nixie pattern and they were so quick to knock up.  The fact that I have a matching pair for my new Nettie top gives me a geeky thrill! 
 
This was my first foray into underwear and it was a really nice one to get started with, some fancier bits and pieces may hit the blog at some point!  

Thursday 14 June 2018

Time passes so much faster than you think!


It feels like today’s make should have happened so much earlier than it did. I love my first Sallie jumpsuit and wear it a lot and each time I wear it I think it’s time to make a new one and yet it’s taken me almost 3 years since my first one to make this one. However I’m glad I did. 
Each year I make myself a new birthday dress and I decided to mix it up this year with a birthday jumpsuit. The closet case files Sallie jumpsuit is a pattern that gets less airtime than some of Heather's other patterns which I think is a shame as it's such a lovely pattern.

I used this petrol blue viscose jersey that’s been in my stash for years. I think it came from fabricsforsale. I didn’t quite have enough of the fabric for the jumpsuit so the lining is pieced together from some other jersey scraps. It’s a party on the inside of this jumpsuit!  I've worn this jumpsuit in pretty solid rotation since I made it and the only negative point is that the fabric still leaks colour really badly, I have ruined a few other items by putting them in a washing cycle with it.
 

I made a couple of alterations to this version from the last one. Instead of using elastic to stabilise the neckline and shoulder seams, I just used strips of a woven fabric. The neckline on my first version stretch out a little and doesn’t sit completely flat. While using a woven to stabilise the neckline made it easier to get a flat neckline, there is no give to it while pulling it on which feels a bit wierd when the rest of the jumpsuit is so stretchy. The other alteration I made was to use a slightly wider elastic than recommended as I only had wider elastic in my stash and I wanted to get this done. It’s worked fine. Apart from that, I followed the instructions entirely.  I think I probably need to take it up a bit though as here I'm wearing it with heels and it's still pooling around my feet, the pattern is clearly designed for Amazons!
 

This is the ultimate secret pjs outfit. It looks pretty elegant but is so easy and comfy to wear.  Perfect for summer events! I may have taken this to the limit by essentially having a nap in it in the park!